Gemini 4 Carbon: No-Hype Full Review & Testing
Gemini 4 Carbon has officially launched, so I put it through three hard builds against Fable 5.2, Opus 5.5 and GPT-6 Astra, with every prompt and cost.

Well, they timed it a day late behind Fable 5.2, but Gemini 4 Carbon has officially launched.
Google is calling it their strongest model yet, and it's sitting high up at the top of the benchmarks, including first place on CursorBench 4.0.
But as we've seen in Google model tests in the past, the benchmarks can be a little deceiving.
So I put Gemini 4 Carbon to the test across web design, game development and motion graphics, against Fable 5.2, Opus 5.5 and GPT-6 Astra.
I clocked how fast each one built, what it cost and how many tokens it burned.
Gemini 4 Argon, if we're being honest, was not even close to Fable 5.2, so I wanted to see how well Carbon actually holds up.
Carbon is available now through the API for all paying developers, and it's rolling out to Google AI Ultra subscribers in Antigravity, the Gemini app and AI Mode in Search.
The introductory price is $2 per million input tokens and $10 per million output tokens, and it goes up to $4 and $20 after November 30.
What I tested
Every model got the exact same prompt, and each one ran in its own lab's tool on high effort.
Gemini 4 Carbon ran in Google's Antigravity, GPT-6 Astra ran in Codex, and Opus 5.5 and Fable 5.2 ran in Claude Code.
Every model had the same tools to work with, Blender for the 3D, the same image generator and the same sound effects generator, so the differences you see come from the models themselves.
This is one run per model, so what you're seeing is what each model built the first time, good or bad.
Opus 5.5 and GPT-6 Astra ran on November 6, and Fable 5.2 and Gemini 4 Carbon ran on November 10 and 11.
Every prompt is below, so you can copy it and run it yourself.
The skills used in these builds (free on GitHub)
Test 1: A pixel-for-pixel website clone
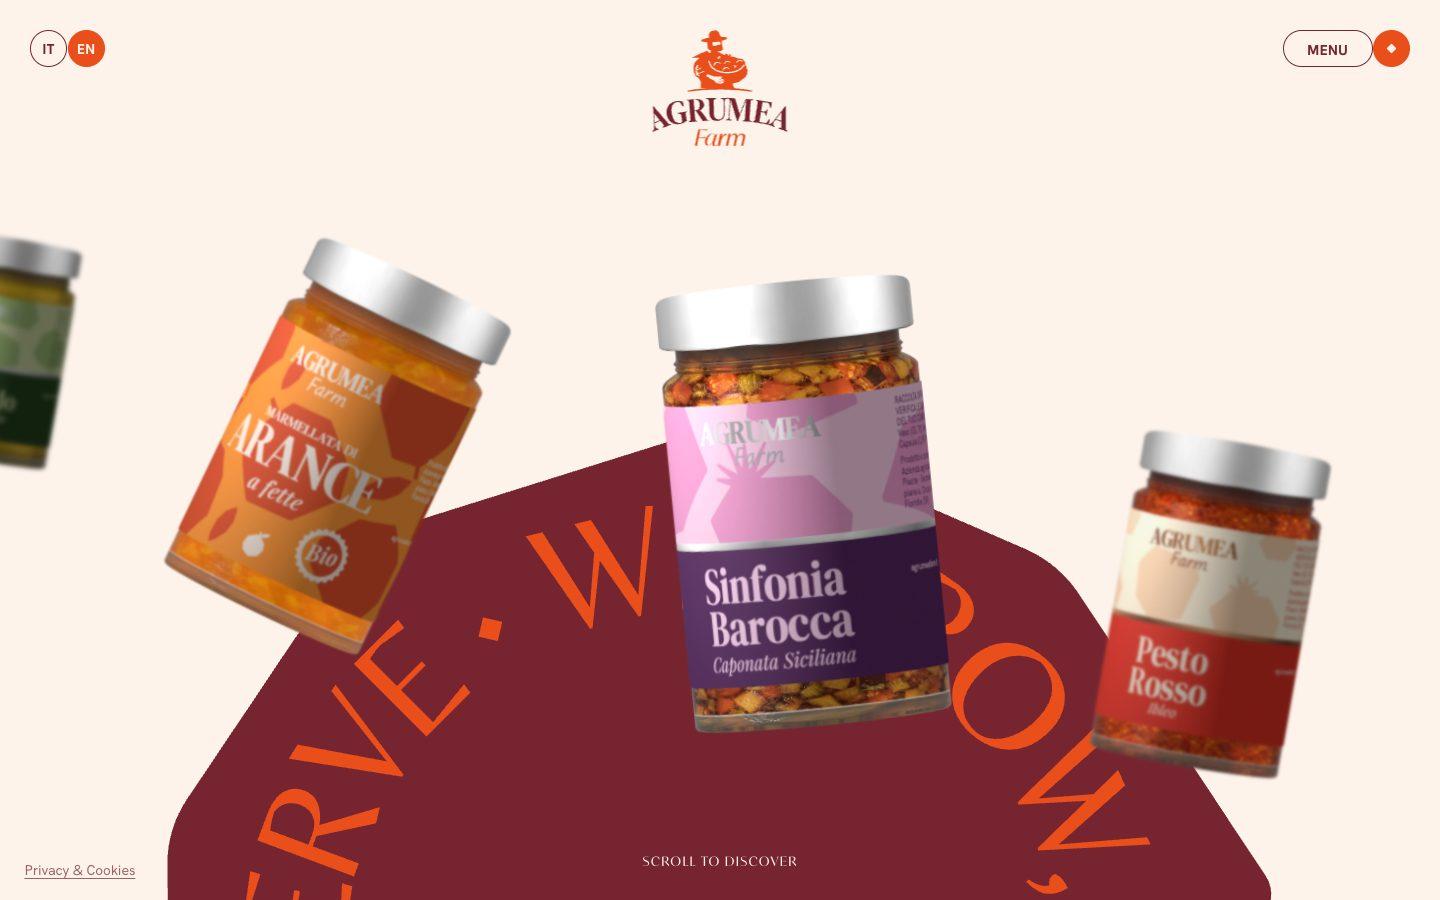
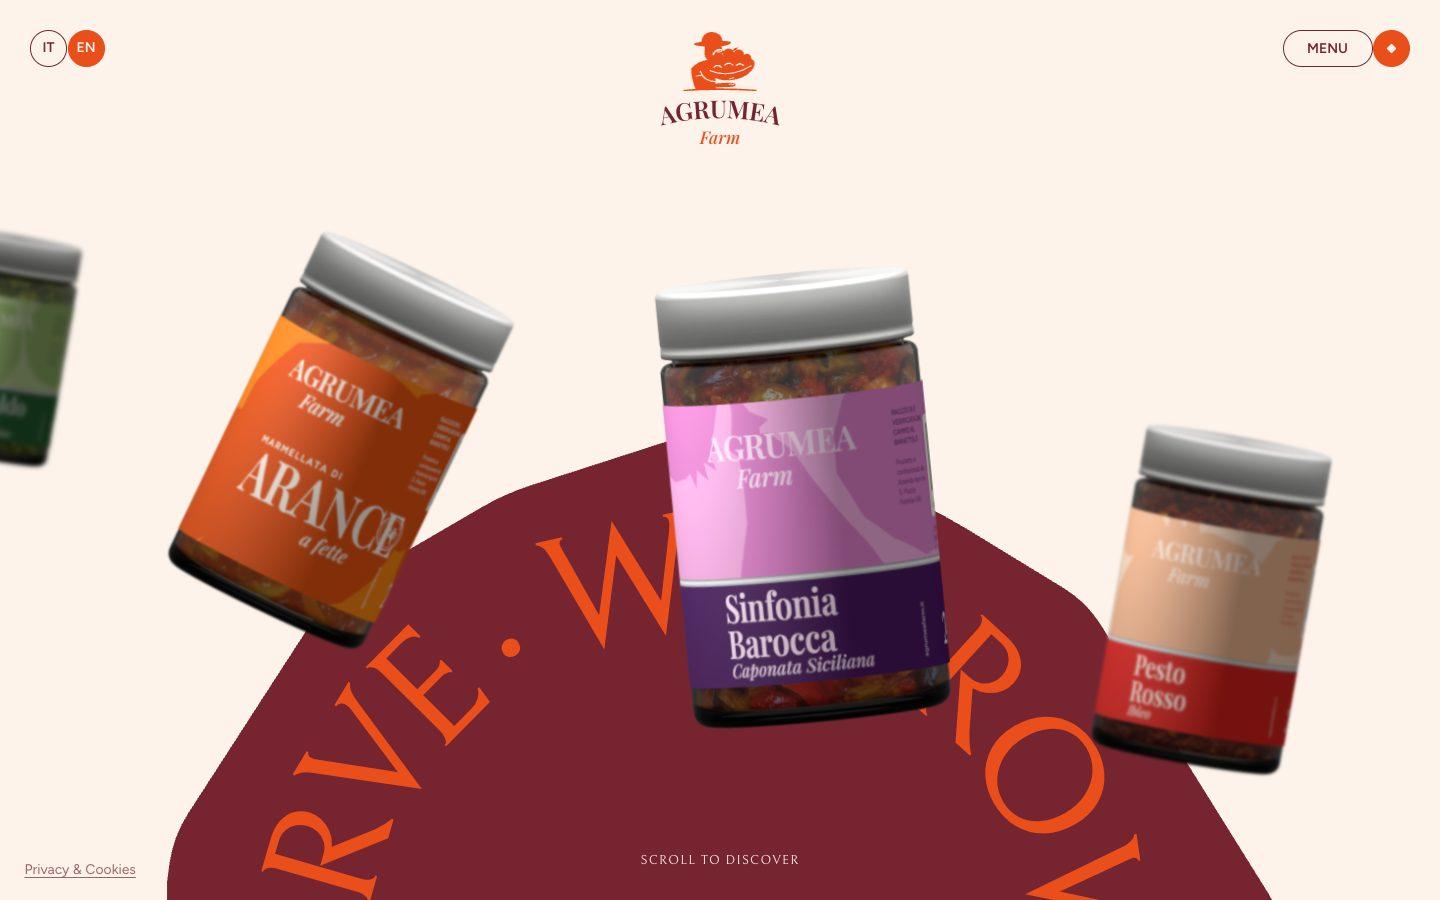
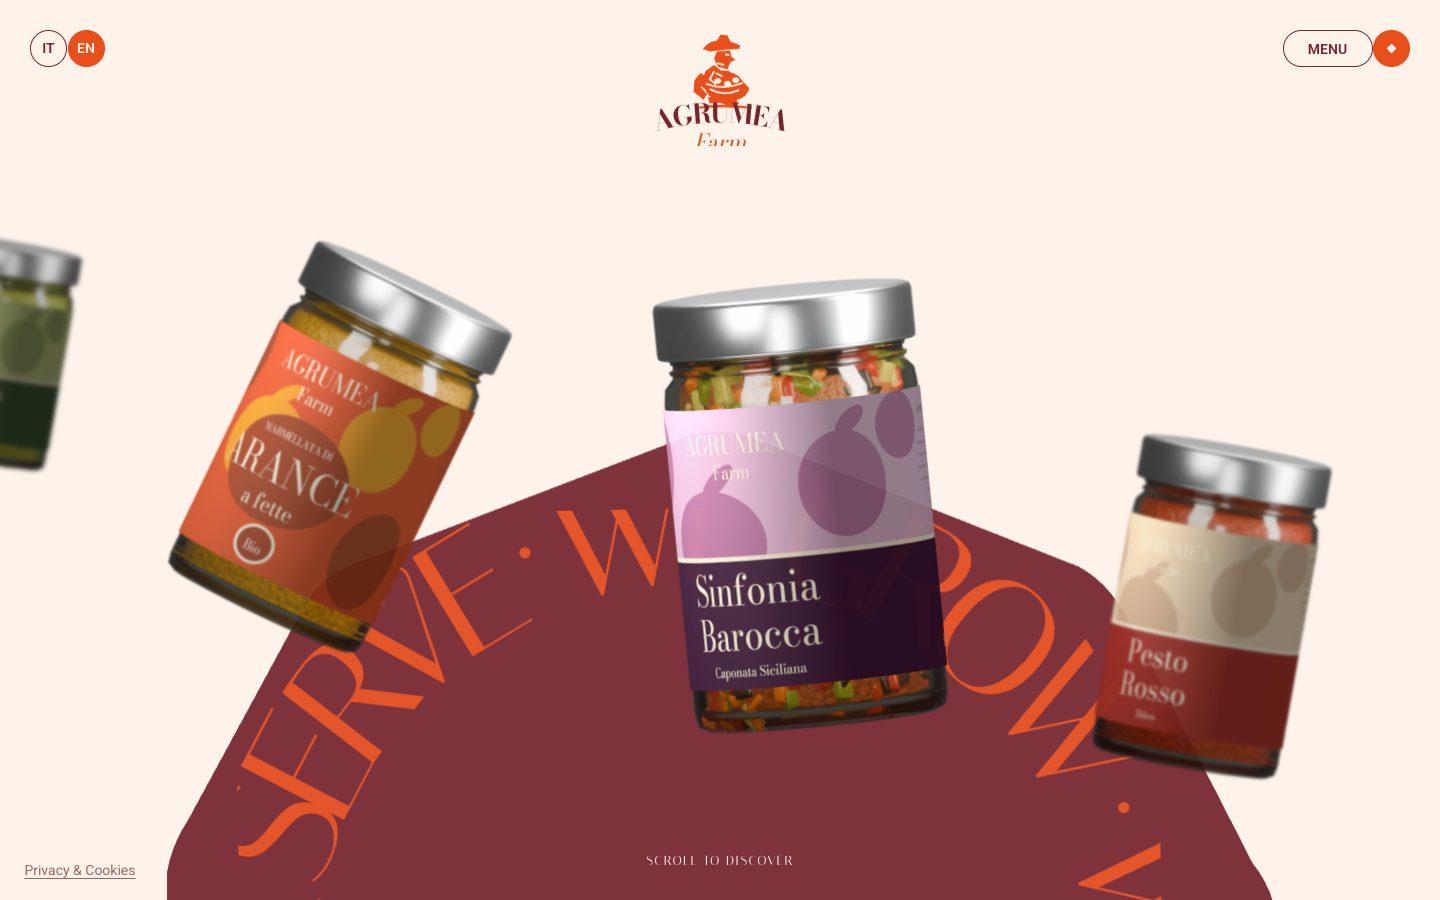
A rebuild of the agrumeafarm.it site with its physics loader, 3D jar carousel and page transitions, making every asset from scratch, following my clone-app-pat-pro playbook.
Rebuild https://www.agrumeafarm.it/en pixel for pixel, every page, every animation and every interaction, making every asset yourself.

Context you should know: this is going into a video watched by a large audience. Your clone is put on screen next to the real site and next to other frontier models given this identical prompt, at the same viewport, and someone clicks, drags and scrolls through both. It is judged strictly on whether a viewer can tell them apart.

The comparison is blind. Never put your model name, your company's name, or any mention of which AI made it anywhere in what you build: not in on-screen text, credits, the page title, file names, code comments, or metadata.

**First, read the methodology.** Clone `https://github.com/per-simmons/clone-app-pat-pro-public` and read `SKILL.md` and `references/00-contract.md` before anything else, then each stage reference as you reach it. Follow its workspace layout, artifacts, verification gate and convergence loop. `scripts/assert-styles.mjs` is the gate.

Two overrides, and they win where they conflict with the repo:

- **Do not stop to check in.** You are running unattended. Run the whole pipeline start to finish without asking for approval or asking questions.
- **Use your own browser automation**, headless Playwright or Puppeteer, anywhere the repo says to use the Claude Chrome extension. Computed styles read off the live page through the CSSOM are ground truth. Screenshots and screen recordings are visual reference only, never the gate.

You have two creative tools: **Blender**, driven headless with Python scripts and rendered on a GPU render machine, and an **image generator** you call from the command line. Every raster image in your clone comes from the image generator or a Blender render.

**Scope: the home page and every page linked from the menu** (Pantry, Production, Experience, About, Contacts, and the product pages you reach by clicking a jar), plus the 404 page. Recon every one of them before you write code, at 1440x900 and 390x844, including the loader, every hover, drag, click and scroll state, the menu, and the transitions between pages.

**What you must nail.** Each of these is checked one by one on camera, side by side with the original:

1. **The loader.** The orange serif percentage counter running 0 to 100%, while faceted fruit shapes fall with real physics and pile up at the bottom of the screen, and you can grab and throw them. Then the full-screen orange panel that sweeps up and off with the thin cream line, and the header revealing itself (IT/EN pills, the farmer-with-basket logo sliding up, the MENU pill).

2. **The home page does not scroll.** It is one screen. The wheel, trackpad and drag move the jar carousel, not the page. A scrolling home page is a failed clone.

3. **The jar carousel.** An endless arc tilted like the original, jars scaling up toward the center and shrinking, blurring and dimming toward the edges, flinging with momentum and leaning with velocity, with the maroon octagon dome and the rotating "WE GROW · WE SERVE" text ring behind it turning as the carousel moves.

4. **The jars are 3D.** Each jar's label wraps around a real cylinder and spins a full 360 degrees on intro. On hover the jar leans toward the cursor and, after a short pause, the label spins a full turn to show the nutrition panel on the back. The glass, lid and label must read as real product photography.

5. **The cursor pill.** The white pill that follows the cursor and changes its text by context ("DISCOVER THE PRODUCT" over jars, "DRAG" over sliders), with the same easing and lag.

6. **Jar to product page.** Clicking a jar flies it into the product page's hero, label still spinning, with no hard cut. On the product page the giant title, the jar rising from the bottom, tilting and spinning its label as you scroll.

7. **Inner pages.** The rounded hero photo card that opens to full width in the first scroll, the cover title, headings revealing letter by letter and paragraphs line by line, the floating tab bar with the sliding orange pill on Pantry and Production, the giant words with a cut-out jar or figure in front of them ("SAVOURY", "VISION"), the pinned About section where the fruits fly in as you scroll, the pinned Experience cards that stack in 3D with the one underneath shrinking, tilting and darkening, and the endless draggable photo slider with momentum.

8. **The menu.** The orange full-screen panel dropping from the top, the huge diagonal links revealing letter by letter and rolling on hover, and closing the same way.

9. **Page transitions.** The maroon panel that covers the screen and lifts off the top between pages, the header hiding on scroll down and returning on scroll up, the smooth-scroll feel on inner pages, the outro photo and the giant "AGRUMEA Farm" wordmark footer on maroon.

10. **Contacts and 404.** The same physics fruit pile; on the 404 the error digits fall too, and a click blasts everything outward.

11. **Extract, don't guess.** Pull real computed values off the live page: the cream, orange, maroon and yellow, type scale, letter spacing, spacing, radii, container widths, breakpoints, and every easing curve and duration you can read from the CSS and JS. Match the timing of each animation to the original within a frame or two.

12. **No lifted assets.** Do not hotlink, download, trace or embed the original's images, SVGs, label artwork, logos or fonts. Make the jars, labels and photos with the image generator or Blender, draw the fruit shapes, dome, ring text and logo yourself, and use open fonts with metrics matched as closely as you can. List every substitution in the README.

13. **Mobile.** Every page and interaction works at 390x844 the way the original does on a phone.

14. **Prove the match.** Run `assert-styles.mjs` against your extracted tokens and iterate until there are zero failures and the project builds clean. Then record your clone and the real site doing the same actions (the loader, a carousel fling, a jar hover, a jar click, the menu, each page transition, each pinned section) and compare them frame by frame, fixing what your eye catches that the assertions missed, until the two are indistinguishable.

15. **Ship it runnable**, with a documented run command and a README covering what you substituted, how you made the jars and imagery, and your final assertion results.

16. **Depth over breadth.** If you have to choose, a loader, home carousel, jar hover, jar-to-product flight and menu that are indistinguishable from the original beat every page approximately right.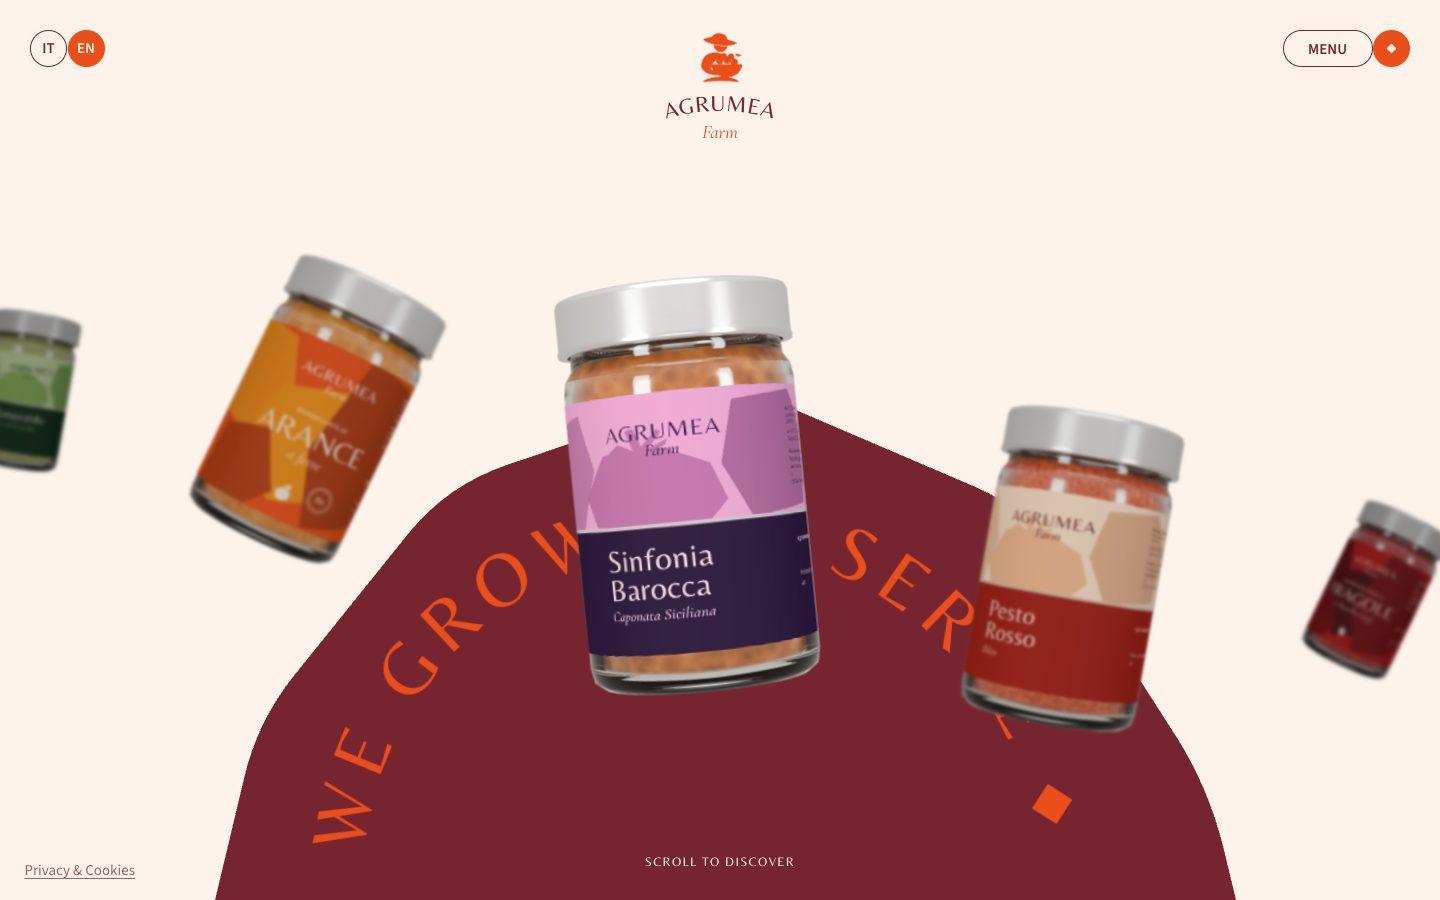
Test 2: A 1940s dogfight flight simulator
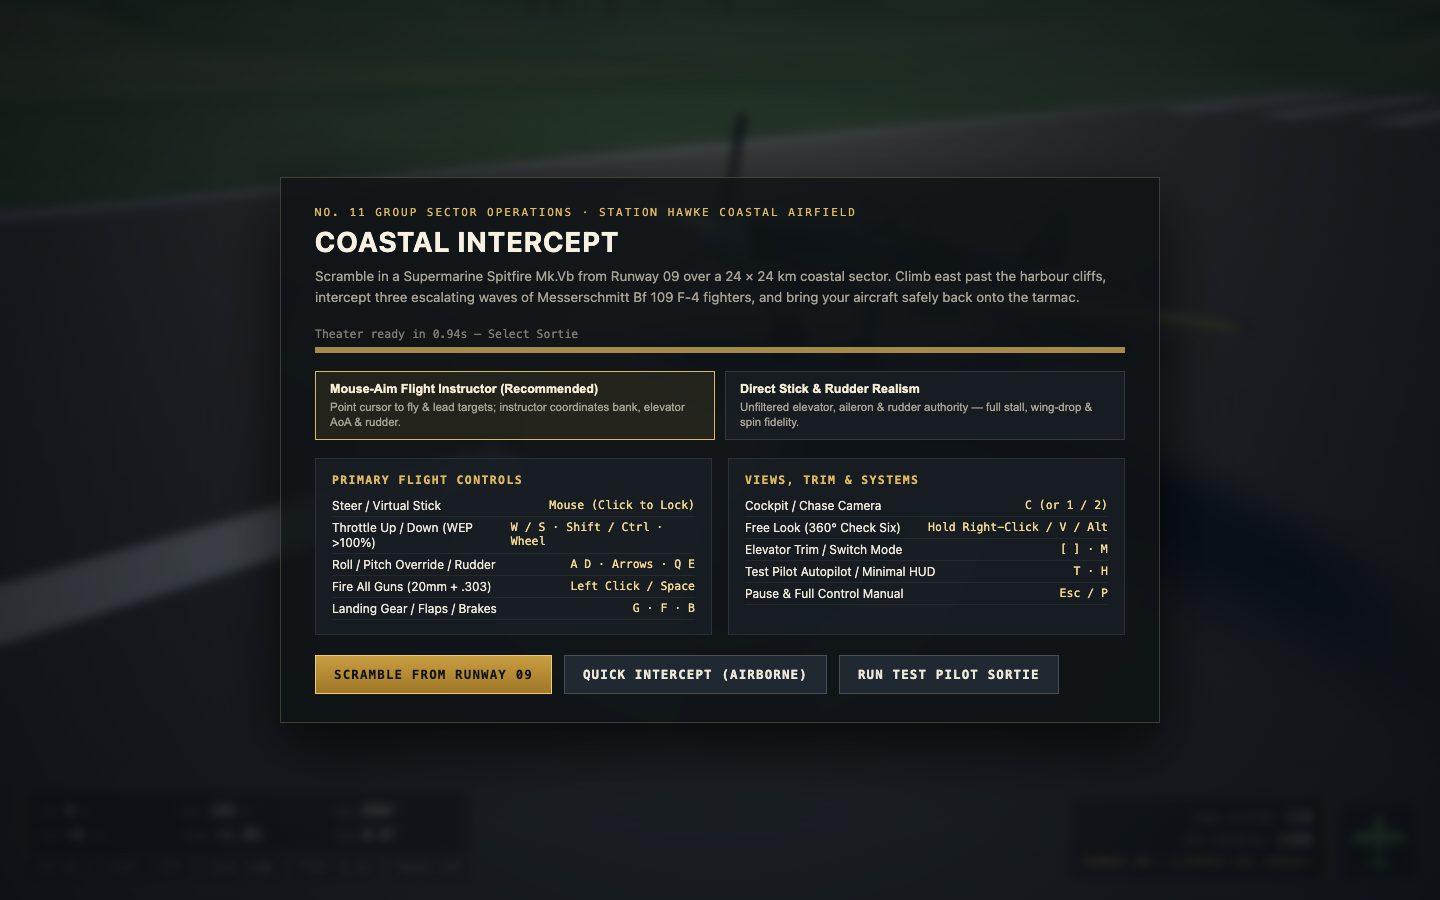
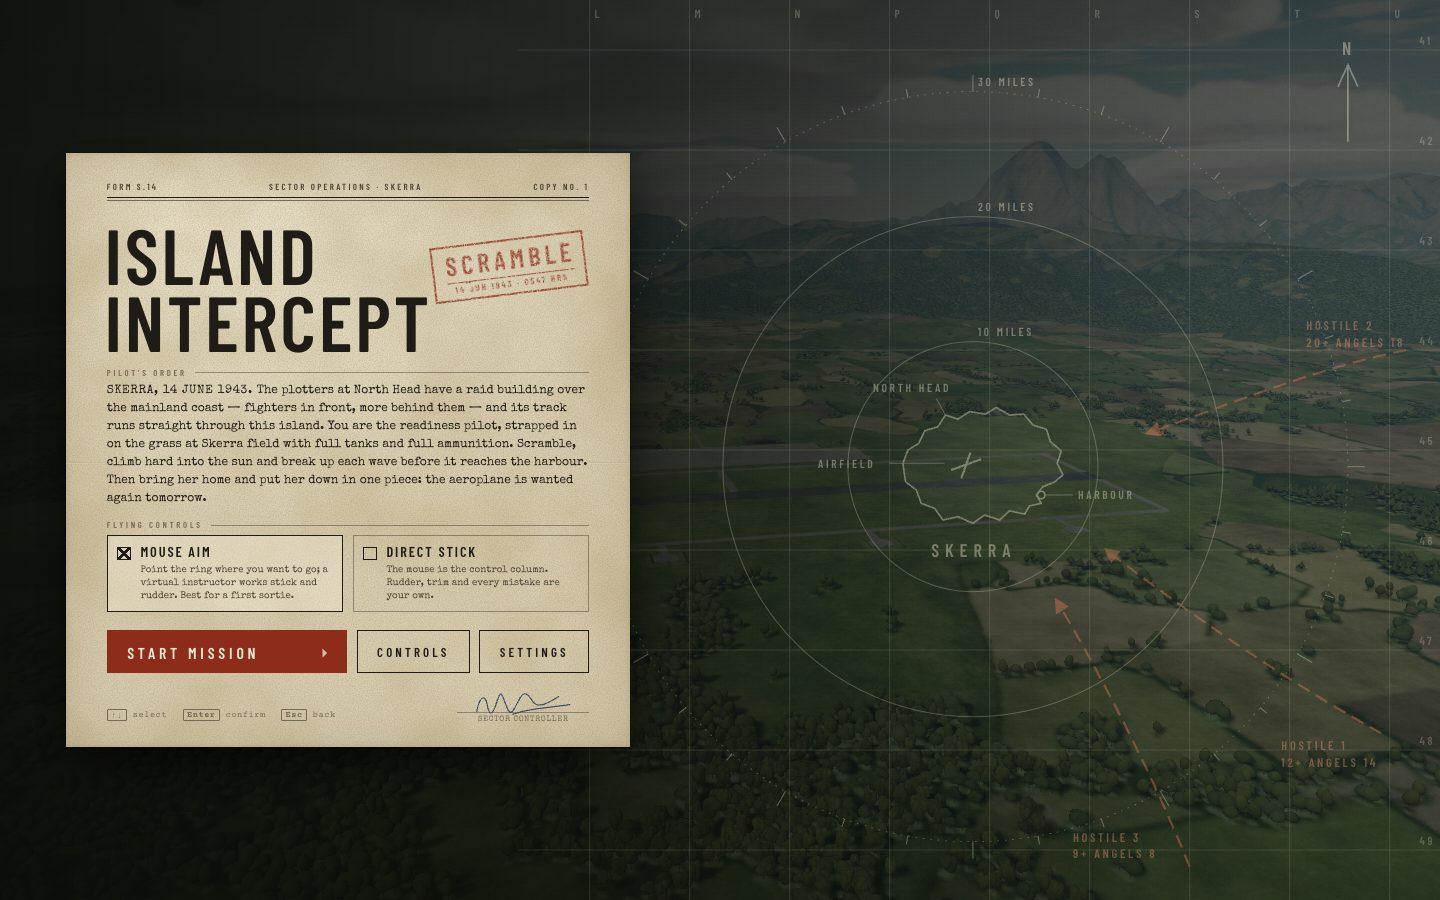
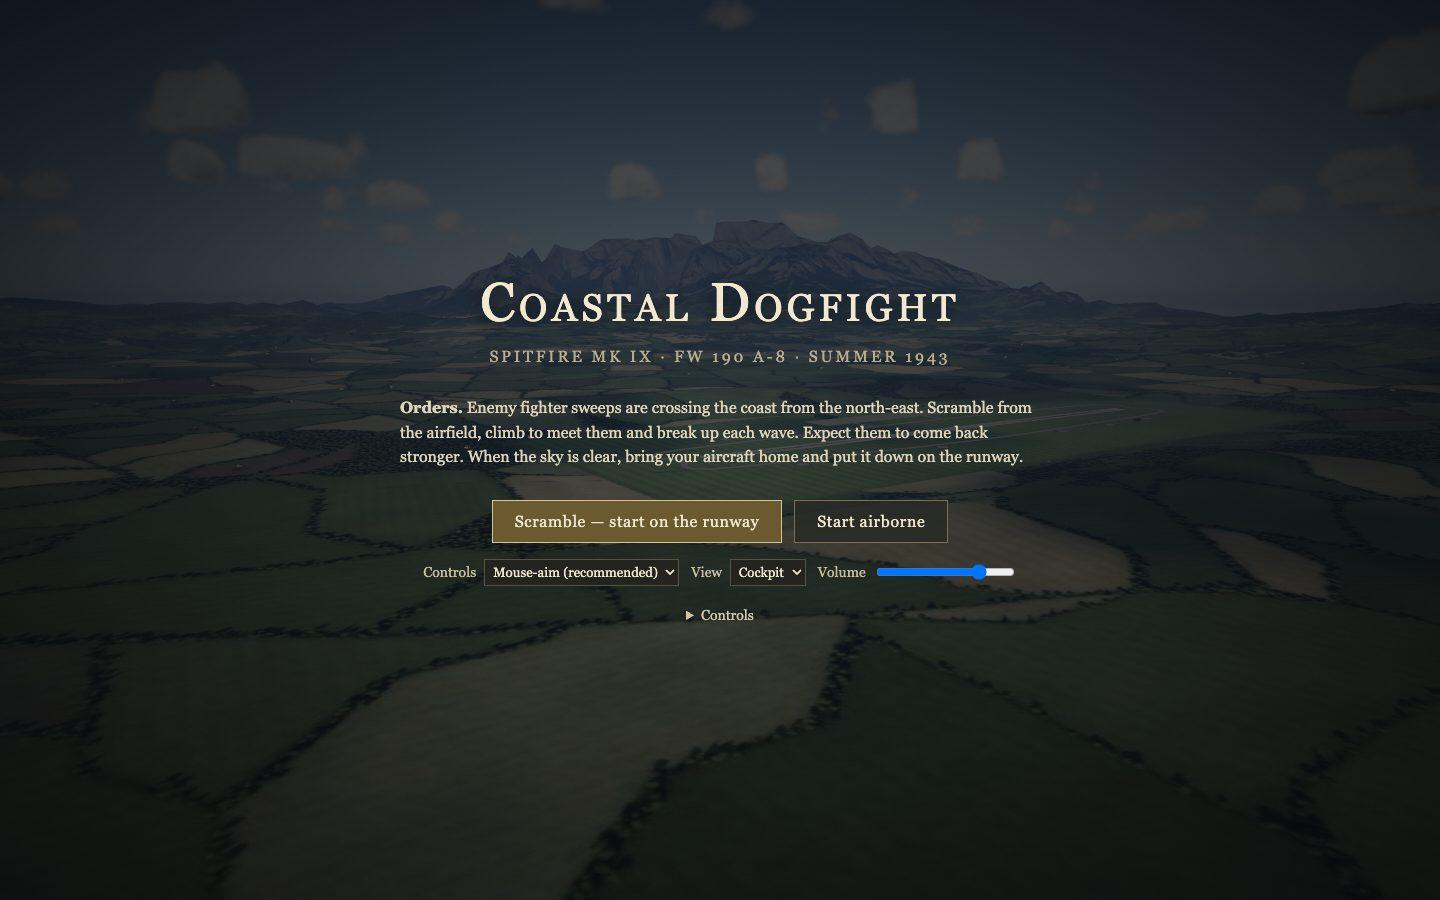
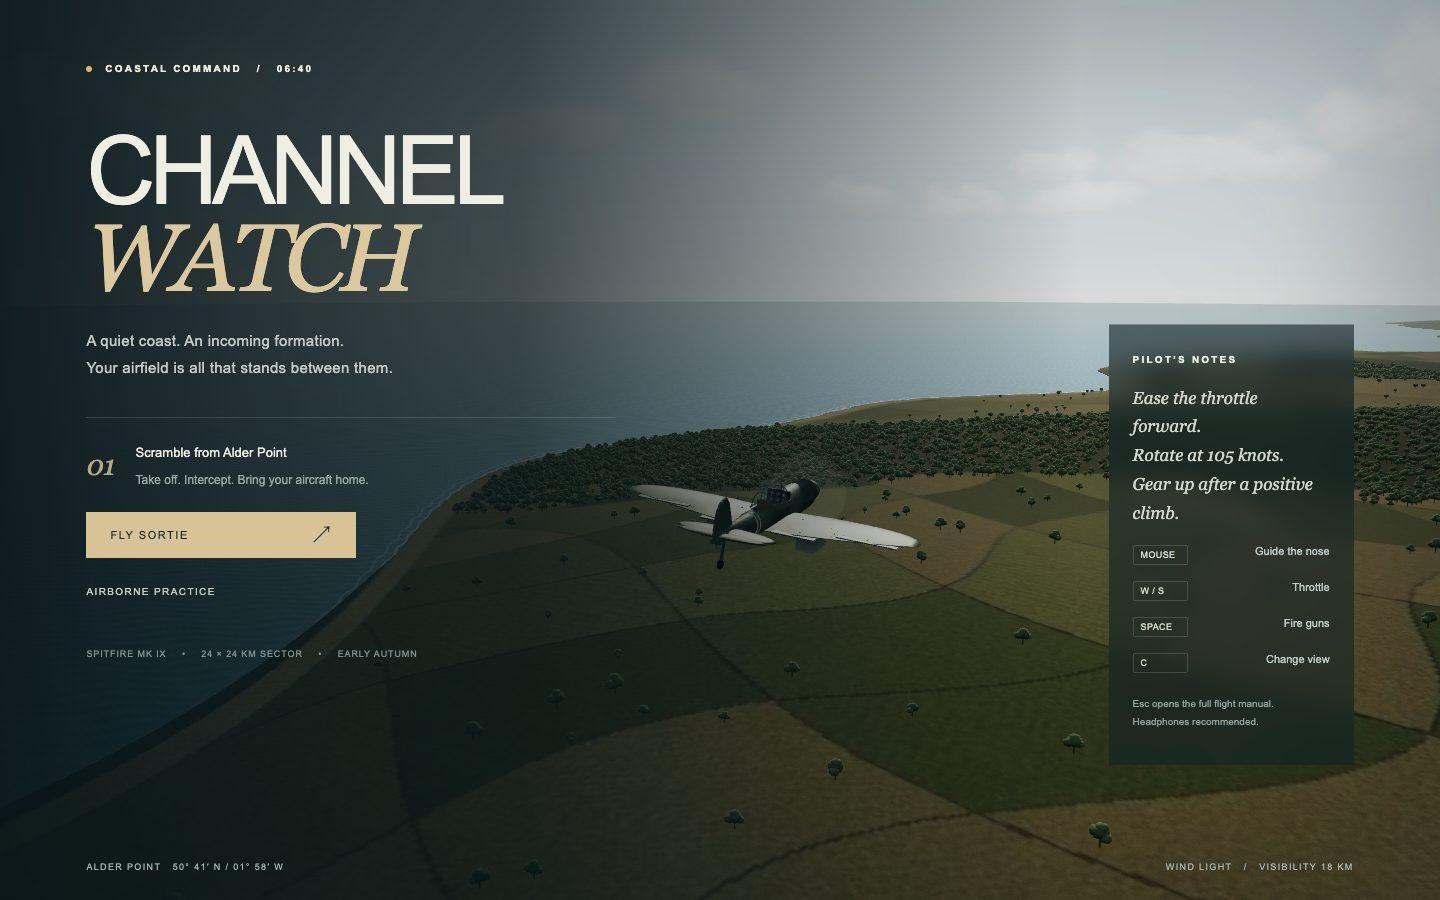
A browser-playable air-combat flight simulator with a real flight model, enemy fighters that dogfight back and a coastline built in Blender.
Build a browser-playable air-combat flight simulator: 1940s propeller fighters dogfighting over a realistic coastline that you build in Blender. It must look and fly as close to real as you can make it.

Context you should know: this is going into a video watched by a large audience. Your game is put on screen next to games built by other frontier models given this identical prompt, played by the same person on the same machine. It is judged on how real it looks, how real it flies, and how good the dogfight is.

The comparison is blind. Never put your model name, your company's name, or any mention of which AI made it anywhere in what you build: not in on-screen text, credits, the page title, file names, code comments, or metadata.

You have three creative tools: **Blender**, driven headless with Python scripts and rendered on a GPU render machine; an **image generator** you call from the command line; and a **sound-effects generator** (ElevenLabs). The game runs in the browser in real time; Blender is how you make the world and the aircraft.

Requirements:

1. **The world, made in Blender.** A coastal region at least 20 x 20 km: mountains or hills that read as real geology (eroded ridgelines, valleys, cliffs at the sea), a coastline with beaches and surf, a river or lake, fields, forest, and at least one town and one airfield with a runway, hangars and a control tower. Model and texture it in Blender (procedural terrain, scattered vegetation, buildings), bake lighting and texture detail, and export it for the browser with sensible level of detail so it holds 60 fps. From 3,000 m it must look like aerial photography, and at 100 m over the trees it must still hold up. Real sky: sun position, atmospheric haze that thickens with distance, volumetric-looking clouds you can fly through or around, a sea with moving waves and sun glint.

2. **The aircraft, made in Blender.** Your fighter and the enemy fighter are two distinct, historically accurate 1940s propeller fighters of your choosing, modeled with correct proportions: spinning propeller (blurred disc at speed), moving ailerons, elevator, rudder and flaps that visibly follow the controls, retractable landing gear, canopy, panel lines, wear and markings that are generic (no real national insignia or unit codes). A detailed cockpit with working gauges (airspeed, altimeter, attitude, turn and slip, RPM) for the cockpit view.

3. **A real flight model.** Not arcade. Lift from angle of attack with a real stall (buffet, wing drop, spin if mishandled), induced and parasitic drag, energy that bleeds in hard turns and returns in dives, engine torque and propeller effects, G limits with blackout and redout, weight and inertia you can feel, trim. Takeoff from the runway and landing back on it must both be possible and must require skill. Write down your equations and constants in the README.

4. **The dogfight.** Guns with real ballistics (muzzle velocity, drop, tracer every Nth round), so you have to lead the target. A per-part damage model: hits on engine, wings, tail, fuel tank and pilot each do something different you can see (smoke, oil on the canopy, fire, a wing that breaks off, a dead engine you have to glide). Enemy AI that actually dogfights: it uses energy, turns, climbs, extends, breaks when you're on its tail, and it can kill you. A mission structure: take off, intercept a wave of enemy fighters, survive escalating waves, land back at the airfield. Score and a debrief screen.

5. **Cameras and feel.** Cockpit view with free look, a chase camera, and a cinematic kill camera that follows a shot-down plane into the ground or sea. Wind noise, engine note that changes with RPM and dive speed, guns, hits, and explosions, all generated, no copyrighted audio and no music you didn't make. A minimal HUD: no arcade clutter.

6. **Controls.** Mouse-and-keyboard with a mouse-aim mode for newcomers and a direct stick mode for realism, plus gamepad. A pause menu with control help.

7. **Prove it works.** QA your own work in a real browser: write a test pilot (an autopilot script) that takes off, flies a pattern, engages one enemy and lands, and use it plus your own screenshots to fix what looks or flies wrong. Check frame rate at 1920x1080. Look at your screenshots critically for realism and fix what a viewer would notice.

8. **Depth over breadth.** If you must choose, a world that looks real, a flight model that feels real, and one great dogfight beat more planes, more modes or more maps.
Test 3: A launch film for Motion
A 30 to 45 second launch film for Motion, the video agent at motion.so, that has to beat Motion's own launch film, made with my launch-video-clone skill.
Make a launch film for Motion, the general video agent at motion.so, that is far better than Motion's own launch film.

Context you should know: this is going into a video watched by a large audience. Your film is played on screen right after Motion's real launch film and next to films from other frontier models given this identical prompt. It is judged on whether it is clearly better than the original: more beautiful, more polished, and better at showing what the product does.

The comparison is blind. Never put your model name, your company's name, or any mention of which AI made it anywhere in what you build: not in on-screen text, credits, the page title, file names, code comments, or metadata. Motion, Mosaic, motion.so, Premiere Pro and After Effects may appear because they are the subject; that is the only exception.

**Follow the skill.** Clone https://github.com/per-simmons/launch-video-clone and read its SKILL.md first. Use its **Original mode** with the `ui-showcase` type file and the motion rules in `references/motion-feel.md`. Before you design anything, run its Clone-mode analysis (step 1) on the reference, so you know exactly what the original does, shot by shot, and where it falls short.

**The reference** is `./reference/ref.mp4`: Motion's own 27-second launch film, 1920x1080, 30 fps, with sound. It is for study only.

**Study the product.** Read https://motion.so and every page it links to (Studio, Enterprise, API and MCP, research). Learn what Motion actually does: you give it footage, writing, a reference or just an idea; it plans the video, builds every shot, and watches its own cut before you see it; the modes on its prompt bar (create a video, edit footage, motion design, clip highlights, talking head, article to video, launch video, multicam, AI avatar); the agent's visible steps ("studying the reference", "planning the cut", "grading and animating", "checking the cut"); export to Premiere Pro and After Effects; the API and MCP. Your film tells that story. State only what the site says; invent no features, numbers or customers.

Requirements:

1. **Apple-grade product film.** The look and pacing of an Apple product launch film built from the product's interface: real-feeling UI in motion, generous negative space, precise type, depth from layering, light and blur rather than clutter, camera moves through and across the interface, and every transition motivated by the product. No people, no stock-footage look, no generic AI-launch clichés (glowing orbs, neon grids, particle swirls, "the future is here" copy).

2. **Show the platform working.** The heart of the film is the product doing its job: a prompt typed into the bar, raw clips and a reference dropping in, the agent's steps appearing as it plans, a timeline assembling itself shot by shot, the finished cut playing, and the export to Premiere Pro and After Effects. Recreate the interface yourself, faithful to motion.so's real design language (its cream and dark surfaces, type, the four-dot mark), and make it feel alive: cursor, hover states, live progress, clips snapping into place.

3. **Better than the original on every axis.** Keep what works in the reference (the falling timeline blocks, the bouncing mark, the prompt box) and do all of it better: smoother easing, cleaner type, richer depth, a clearer story, a stronger ending. Your BUILD_NOTES.md lists, shot by shot, what the original did and what yours does better.

4. **Length and sound.** 30 to 45 seconds, 1920x1080, 30 fps. A soundtrack and sound design made with ElevenLabs that hit the cuts and UI moments.

5. **Make every asset yourself.** Draw the UI, mark and graphics in code or with the image generator. Do not cut, trace or reuse frames, footage, logos or audio from the reference.

6. **Review it like a director.** Render, watch your own frames (the skill's compare and review tools), and fix anything that looks cheap, crowded, mistimed or generic, until every shot would hold up in an Apple keynote.

7. **Deliver** `final.mp4` in this folder, the project that renders it, and BUILD_NOTES.md.What it cost
Gemini 4 Carbon was the cheapest model on all three tests, and its three builds came to $27.68 together.
Fable 5.2 was the most expensive on all three, at $883.30 in total, and $594.80 of that was the Agrumea clone alone.
Opus 5.5 came to $181.29 across the three builds, and GPT-6 Astra came to $126.43.
Part of the Fable 5.2 flight sim's log was lost when my disk filled up during the run, so its tokens and cost may be undercounted.
The costs are what each build would cost at API prices, even though I ran them on my subscriptions, so you can compare them fairly.
These are API-equivalent costs, meaning the real token counts from each build priced at each model’s published rates, even though the builds themselves ran on subscriptions.
The takeaway
Gemini 4 Carbon was the cheapest model on every test, at $10.86 for the Agrumea clone, $10.00 for the flight sim and $6.82 for the launch film.
It also used the fewest input tokens of any model on the Agrumea clone, 27.7 million against 753.5 million for Fable 5.2.
GPT-6 Astra was the fastest on all three, finishing in 68, 79 and 34 minutes.
Fable 5.2 ran the longest on the Agrumea clone and the launch film, at 533 and 248 minutes, and Opus 5.5 ran the longest on the flight sim at 376 minutes.
Every build finished and is live above, so you can open each one and compare them yourself.
The Gemini 4 Carbon flight sim stopped after 44 minutes, and I resumed it in the same conversation to finish the build.
I'll add my ranking for each test here once the video is out.

Comments
Sign in to join the conversation.