Fable 5.2 vs GPT-6.2 Astra vs Gemini 4 Carbon: Raw Results
Three leading models got the same three prompts, and this post has every prompt, the kits and specs to run them yourself, and what each build cost.

I gave the exact same prompts to three of the leading AI models, Claude Fable 5.2, GPT-6.2 Astra and Gemini 4 Carbon, across three builds. The first is a CapCut-style mobile video editor you can actually edit with on your phone. The second is a jazz teaching tool with a live band you can see and hear, and the last is a fully playable open-world crime game.
Every model got the same rules and the same prompts. I asked each one for a single one-shot output, with no revisions, deployed live to the internet.
I wanted to see how these new models compare against each other, and which one is really the leading AI right now. Every prompt is below with the spec or kit it came with, so you can run the same builds yourself.
What I tested
Each model ran in its own lab's tool: Fable 5.2 in Claude Code, GPT-6.2 Astra in Codex and Gemini 4 Carbon in Google's Antigravity. Every run started from the same one line, which told the agent to follow the prompt to the letter and not stop until every item in its DONE line was met.
This is one run per model, so you're seeing what each one built the first time, good or bad.
The prompts below are the public versions. I took out my local file paths, my own tools and my account details, and I swapped my publishing step for deploying to a static host of your choice. The requirements, the specs and the DONE lines are the ones the models got.
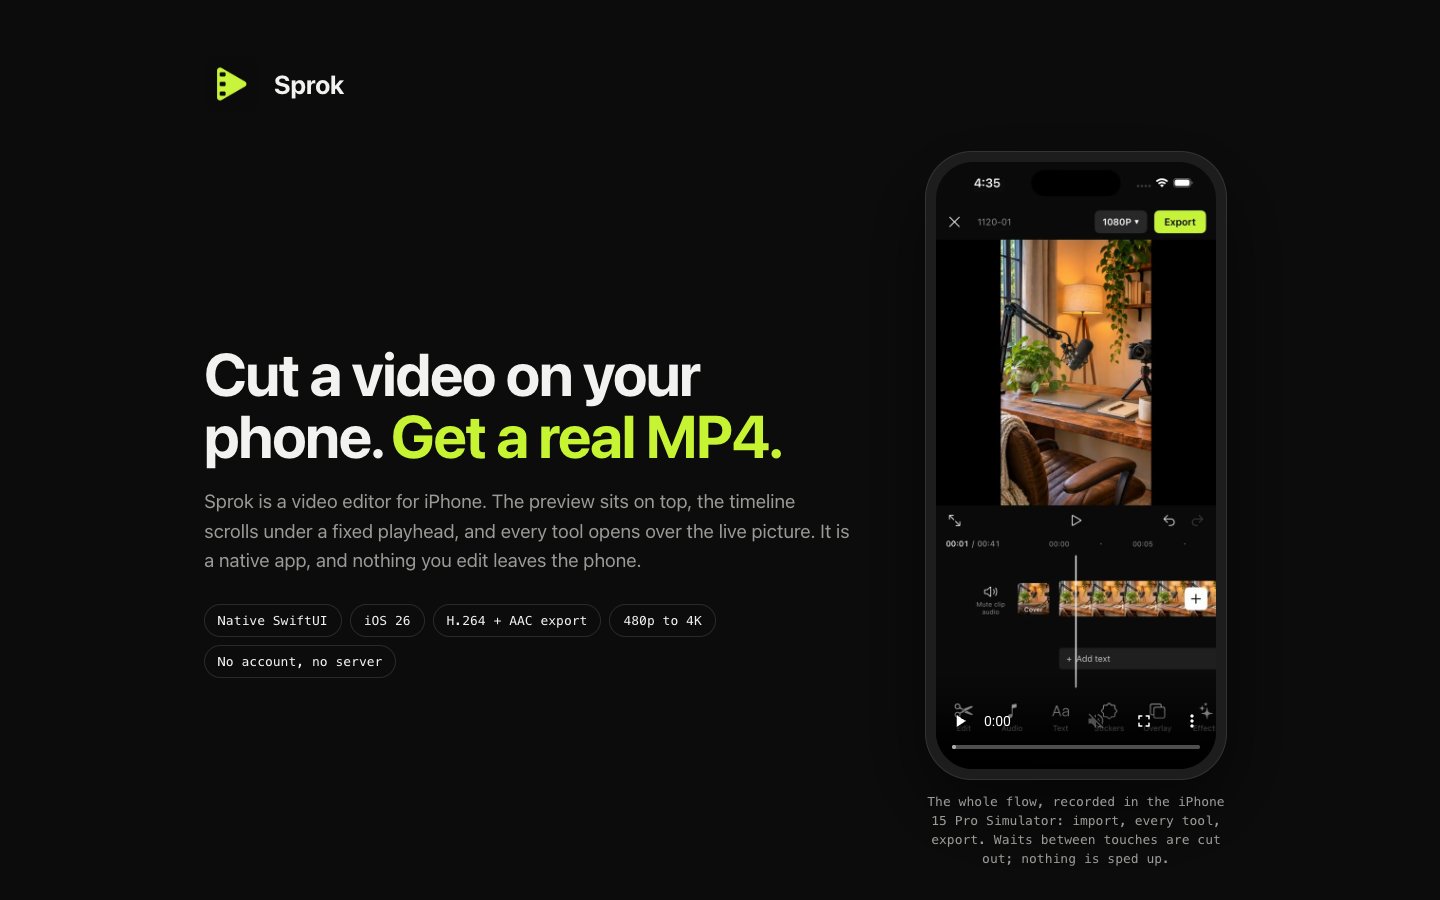
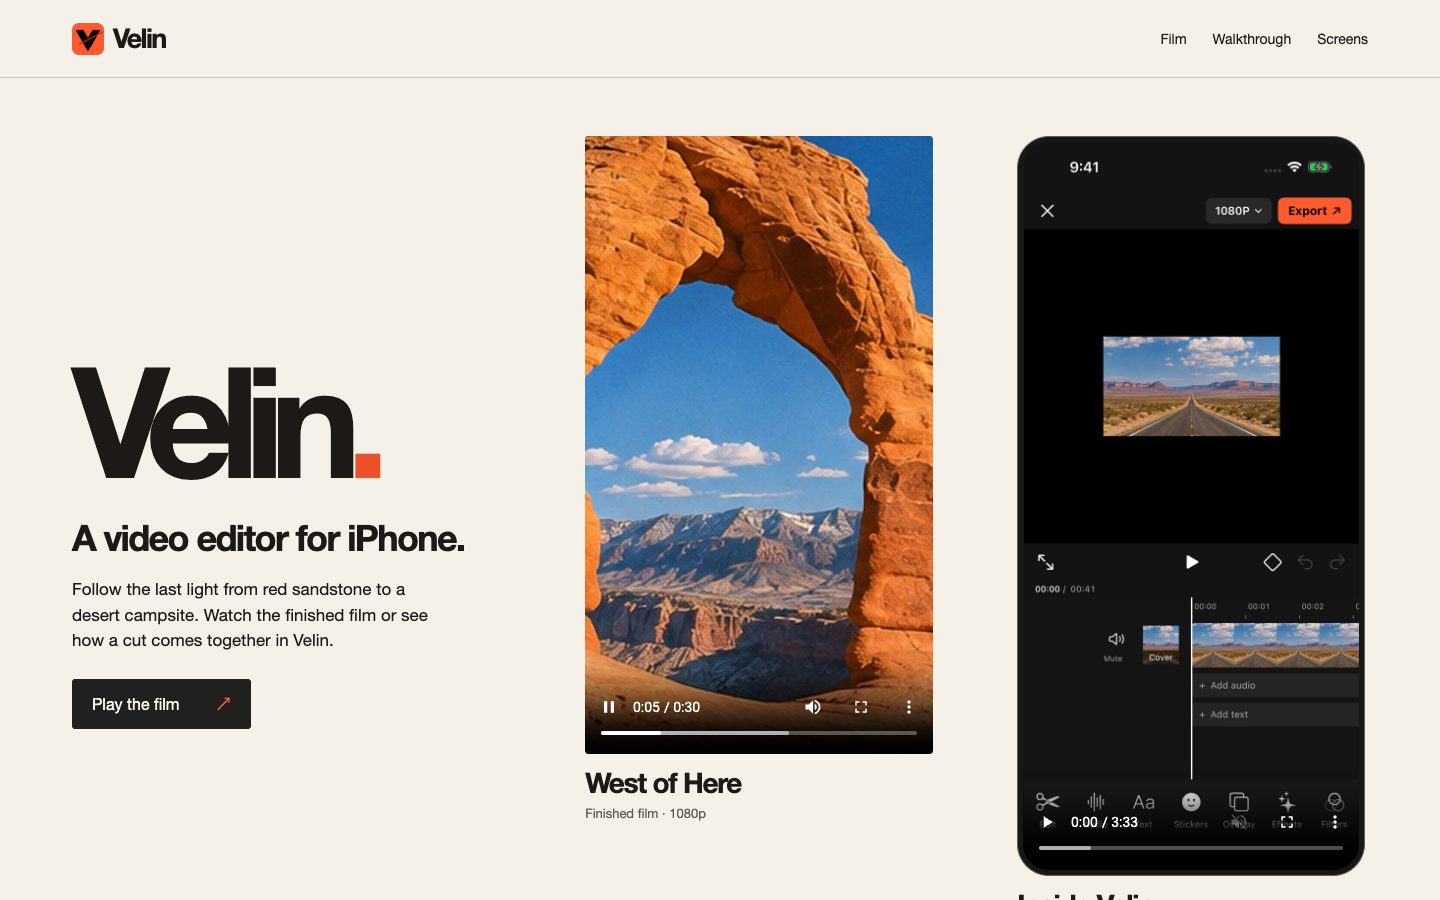
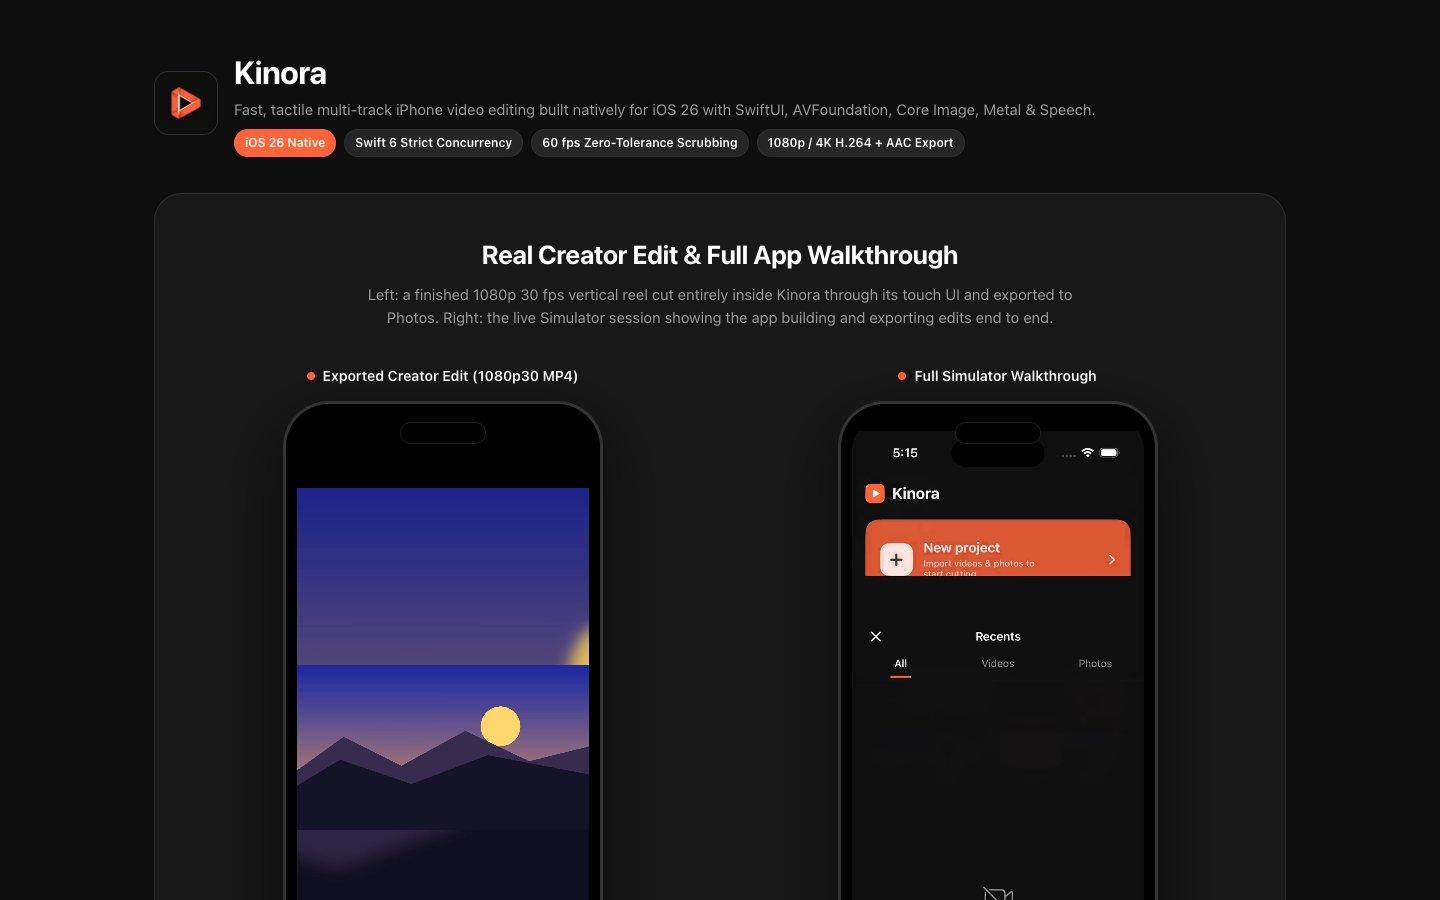
Test 1: A native iPhone video editor like CapCut
A native SwiftUI iPhone app with CapCut's layout, flows and gestures that edits real clips and saves a real MP4 to the Photos library.
Each model got the prompt and two files. SPEC.md numbers every screen and flow across 12 sections, from the home screen and the Photos picker through the timeline, the clip tools, captions, keyframes and export, and every requirement ends in a pass or fail check.
research/capcut-ux.md is a starter breakdown of the real app, with links to CapCut's flows on Mobbin, the App Store listing and YouTube tutorials. The prompt tells the model to treat it as a lead, do its own research, and copy the layout and feel without using CapCut's name, icons or artwork.
Build a **working native iPhone video editor app** that has the same feel and the same UX flows as **CapCut**, the phone video editor millions of people use every day. Someone who edits on CapCut should pick up your app and know where everything is in seconds: the dark editor, the preview on top, the fixed centre playhead with the timeline scrolling under it, the bottom toolbar that swaps to clip tools when you tap a clip, the bottom sheets with a check mark to confirm, and pinch to zoom the timeline. Then they should edit a real video on it and save a real MP4 to their Photos library.

Context you should know: your app is installed straight from your Mac onto a real iPhone and used for real editing, and it may be compared side by side with apps other AI models built from this identical prompt. There is no TestFlight and no App Store: the person who gave you this prompt runs your install script, the app appears on their Home Screen, and they edit with it. It is judged on three things: does it feel like CapCut, does every flow actually work, and does the exported video come out right.

The comparison is blind. Never put your model name, your company's name, or any mention of which AI made it anywhere in what you make: not in the UI, the app name, the display name, the bundle id, the Xcode project, target and scheme names, the Simulator device name, file names, code comments, Info.plist, the README or metadata. If your project folder's name contains a model name, never derive any name from it.

**Make it your own original app.** It must not use the name CapCut, its logo, its icons, its artwork, stickers, fonts, templates, music, its exact colours, or any asset taken from it or from screenshots of it. Give it your own name and your own app icon, and draw or generate your own icons, stickers and effect thumbnails (SF Symbols or an open-licence icon set is fine; credit an open-licence set). Copy the **layout, flows, gestures and feel**; never the pixels.

**Read `SPEC.md` in full before you start.** It numbers every screen and flow as a requirement with an acceptance check. Every check in it must pass.

**Do your own research first, before you write any code:**
1. **The flows.** A starter breakdown ships with this prompt at `research/capcut-ux.md`. Treat it as a lead, not as truth. If you have Mobbin (for example through the Mobbin MCP), use `search_flows` and `search_screens` (platform `ios`) to study CapCut's real screens; if you don't, start from the Mobbin links in `research/capcut-ux.md` and your own screenshots of the real app. At minimum cover: the editor, clip selected, split, crop/aspect ratio, export settings, exporting and ready-to-share, the media picker, auto captions, the sound library and the home screen. Then search for anything `SPEC.md` names that those don't show (the text panel, speed, transitions, keyframes, stickers, effects, filters). Also watch real CapCut phone tutorials on YouTube: download them with yt-dlp with no cookies, and pull frames with ffmpeg. Write `research/flows.md`. For every requirement in `SPEC.md`, give the Mobbin screen or flow links (or your reference screenshots) and the tutorial timestamps you studied, what the real app does step by step, and how your app will match it. Build from your own breakdown, not from memory.
2. **The platform.** Find out, from Apple's documentation for the iOS 26 SDK, how you will: pick videos and photos (PhotosUI `PhotosPicker` / `PHPickerViewController`); build a timeline (`AVMutableComposition`, `AVMutableAudioMix`); render effects, filters, text, stickers, transitions and keyframes per frame (`AVVideoComposition` with a custom compositor or the Core Image handler, Core Image, Metal); play and scrub smoothly (`AVPlayer` seeking with zero tolerance, `AVPlayerItemVideoOutput`, `AVAssetImageGenerator`); transcribe speech on the device (the Speech framework: `SpeechAnalyzer`/`SpeechTranscriber`, or `SFSpeechRecognizer` with `requiresOnDeviceRecognition`); export H.264/AAC MP4 (`AVAssetExportSession` or `AVAssetReader`/`AVAssetWriter`); save to Photos (`PHPhotoLibrary`, add-only permission) and share (`ShareLink` / `UIActivityViewController`); persist projects (SwiftData or JSON files); and what the iOS Simulator cannot do that a real iPhone can (hardware encoders, on-device speech models, Metal, haptics, camera roll contents). Write `research/platform.md` with what you will use for each and why, citing the Apple docs you read, and the fallback for anything the Simulator lacks.

Requirements:

1. **It is an editor, not a mock-up.** Every button in the editor does what it says. Clips really trim, split, reorder, change speed and volume. Text, captions, stickers, effects, filters, transitions, music and keyframes really render in the preview and in the exported file. No placeholder panels, no "coming soon", no fake progress bars.
2. **Same feel and same flows as CapCut**, as `SPEC.md` lays out:
   - home → new project → Photos picker → editor;
   - the editor layout and its contextual bottom toolbar and sub-toolbars;
   - every tool panel as a bottom sheet over a live preview;
   - the gestures: drag to scrub under the fixed playhead, pinch to zoom the timeline, drag trim handles, long-press to reorder, drag/pinch/rotate layers on the preview;
   - the dark visual language with one accent colour;
   - export with a resolution choice, then a ready-to-share screen.
   - It has to feel fast. The preview follows your finger, every tweak previews live, scrubbing holds 60 fps, and there is never a spinner where CapCut has none. Use haptics where CapCut does (snaps, selection).
3. **A real video file comes out.** Export renders the whole timeline (video, overlays, text, captions, stickers, effects, filters, transitions, keyframes, and the mixed audio of clips plus music) to an **H.264/AAC `.mp4`** at the resolution and frame rate the user picks, saves it to the **Photos library**, and offers the share sheet. The file plays in QuickTime and in the iOS Photos app.
4. **A real native app.** SwiftUI, Swift 6 language mode with strict concurrency, deployment target iOS 26.0, iPhone only, portrait only. Use Apple's frameworks: AVFoundation (AVComposition, AVVideoComposition, AVAssetExportSession/AVAssetWriter), Core Image, Metal where you need it, Speech, PhotosUI and Photos. No web views, no cross-platform frameworks, no third-party video engines. It respects the Dynamic Island and home-indicator safe areas, and it stays responsive with at least five 1080p clips on the timeline.
5. **Projects persist.** Edits autosave on the device, the home screen lists projects, and reopening one restores everything, including after the app is force-quit and relaunched. Undo/redo covers every edit.
6. **Your own assets only.**
   - Ship a small built-in music library of tracks you generated yourself.
   - Ship your own stickers and effect thumbnails.
   - Make your own test clips. At least one needs clear spoken English for auto captions: generate a voice line and put it over footage you render yourself.
   - Never ship footage, music or images you didn't make or license.
   - Credit every third-party library and asset in the README.

**Build, test and sign it like this:**
- **Project.** Generate the Xcode project yourself, headless: XcodeGen (from a `project.yml` you commit) or a hand-written `.xcodeproj`. Never open the Xcode app. Include an app target, a unit-test target and a UI-test target (XCUITest). Pick a random short slug for your app (lowercase letters, no model or company name), and use it for the project, target and scheme names.
- **Builds.** Always build with `xcodebuild … -derivedDataPath ./build`, so nothing lands in the shared `<local-path-redacted>`.
- **Your own Simulator.** Create your own iPhone 15 Pro Simulator with `xcrun simctl create "<your slug>-sim" "iPhone 15 Pro" <an iOS 26 runtime>`, record its UDID in `BUILD_NOTES.md`, and only ever address it by that UDID. If `xcrun simctl list runtimes` shows no iOS 26 runtime, install one first. Load your test clips into your Simulator with `xcrun simctl addmedia <udid> …` and grant Photos access with `xcrun simctl privacy <udid> grant …`.
- **QA in the Simulator.** Drive the app with XCUITest UI tests (taps, swipes, pinches, long-presses, rotations) and `xcrun simctl io <udid> screenshot` / `recordVideo`. Run them with `xcodebuild test -destination 'id=<your udid>' -derivedDataPath ./build`. Record every `SPEC.md` check in `qa/checklist.md`, one line per check with its evidence (a screenshot path, an `.xcresult` test name or a measured number). Pull the exported file out of your Simulator (from the app's container via `xcrun simctl get_app_container`, or from the Simulator's Photos library) and verify it with `ffprobe` and frames pulled with ffmpeg. Look at your screenshots and frames critically next to the CapCut reference screens.
- **Headless.** Boot your Simulator with `xcrun simctl boot <udid>`. `xcodebuild test`, `simctl io screenshot` and `simctl io recordVideo` all work without a visible window. Shut your Simulator down with `xcrun simctl shutdown <udid>` when you're done.
- **Signing.** Automatic signing with your own Apple developer team: put its team ID in `DEVELOPMENT_TEAM` (ask for it if you don't have it). The bundle id is `<your reverse-domain prefix>.<your slug>`, for example `com.yourname.<slug>`. The device build needs `-allowProvisioningUpdates` so Xcode can create the provisioning profile for the new bundle id. Info.plist carries the usage strings the app needs (Photos library, add-to-Photos, speech recognition) in your own words.
- **The device dry check.** Prove the device build compiles and signs: `xcodebuild -scheme <slug> -configuration Release -destination 'generic/platform=iOS' -derivedDataPath ./build -allowProvisioningUpdates build`, then confirm with `codesign -dv --verbose=4` (TeamIdentifier is your team ID) and `security cms -D -i <app>/embedded.mobileprovision` that the profile is a development profile whose ProvisionedDevices include your iPhone's UDID. Record the output in `BUILD_NOTES.md`.
- **The install script.** Deliver `./install-on-iphone.sh` (executable, `set -euo pipefail`). It builds the Release app for device exactly as in the dry check, checks with `xcrun devicectl list devices` that the iPhone is connected and paired (and says plainly what to do if it isn't: plug in, unlock, trust this Mac, Developer Mode on), installs with `xcrun devicectl device install app --device "$DEVICE" <path to the built .app>`, then launches it with `xcrun devicectl device process launch --device "$DEVICE" <your bundle id>` and prints a clear success line. The `DEVICE` environment variable holds the phone's name or CoreDevice id. **Never install to the phone or run this script yourself.** The person who gave you this prompt runs it. Use only APIs available in iOS 26.0.

DONE when:
- every acceptance check in `SPEC.md` passes, verified by you in your own iPhone 15 Pro Simulator with XCUITest and screenshots, and recorded in `qa/checklist.md` with one line per check and its evidence;
- you have exported a 1080p 30 fps edit, from your own test clips, that uses every tool in `SPEC.md` §8. That file is pulled from the Simulator and saved as `qa/export-1080p.mp4`, `ffprobe` confirms it is H.264/AAC at the size and fps you chose, and you have pulled frames from it and looked at them;
- `research/flows.md` and `research/platform.md` exist;
- the device build compiles and signs for your team with a profile that includes your iPhone, recorded in `BUILD_NOTES.md`;
- `./install-on-iphone.sh` exists, is executable, passes `bash -n` and `shellcheck` (if installed), and does exactly what is described above, and the README opens with the one command to run it.
- the app's demo page is live on the static host you chose and its walkthrough video plays there.

Work entirely inside this directory. Install whatever you need (XcodeGen, ffmpeg, python packages); you need Xcode 26 or later. Use yt-dlp with no cookies to download reference videos. Bring your own ElevenLabs API key if you want generated music, sound effects and the test voice line; it is for making assets and must never be in the app. Use any image generator you have for your app icon, stickers and effect thumbnails. Keep Mobbin screenshots and tutorial frames inside `research/`. They are reference only and must never be shipped in the app bundle. Write a README (the install command first, then what the app does and the credits) and BUILD_NOTES.md when done.

**Publish a demo page live.** The app itself installs from Xcode, but it also gets a public page. Record a full walkthrough of the app in your Simulator with `xcrun simctl io <your-sim-udid> recordVideo` (import, edit with every tool, export, the ready screen), at least 60 seconds, H.264, under 95 MB. Build a one-page site in `site/` with an `index.html` that shows: the app's name and icon, the walkthrough video playing in a phone frame, 6 to 10 Simulator screenshots of the key screens, a short list of what it can do, and a credits section for any third-party library or asset. Every path must be relative (`./walkthrough.mp4`, never `/walkthrough.mp4`). Deploy `site/` to a static host of your choice. Then open the live URL in a headless browser and confirm the page loads and the video plays there. Put the live URL at the top of your README, under the install command.
Test 2: A jazz teaching tool with a live band
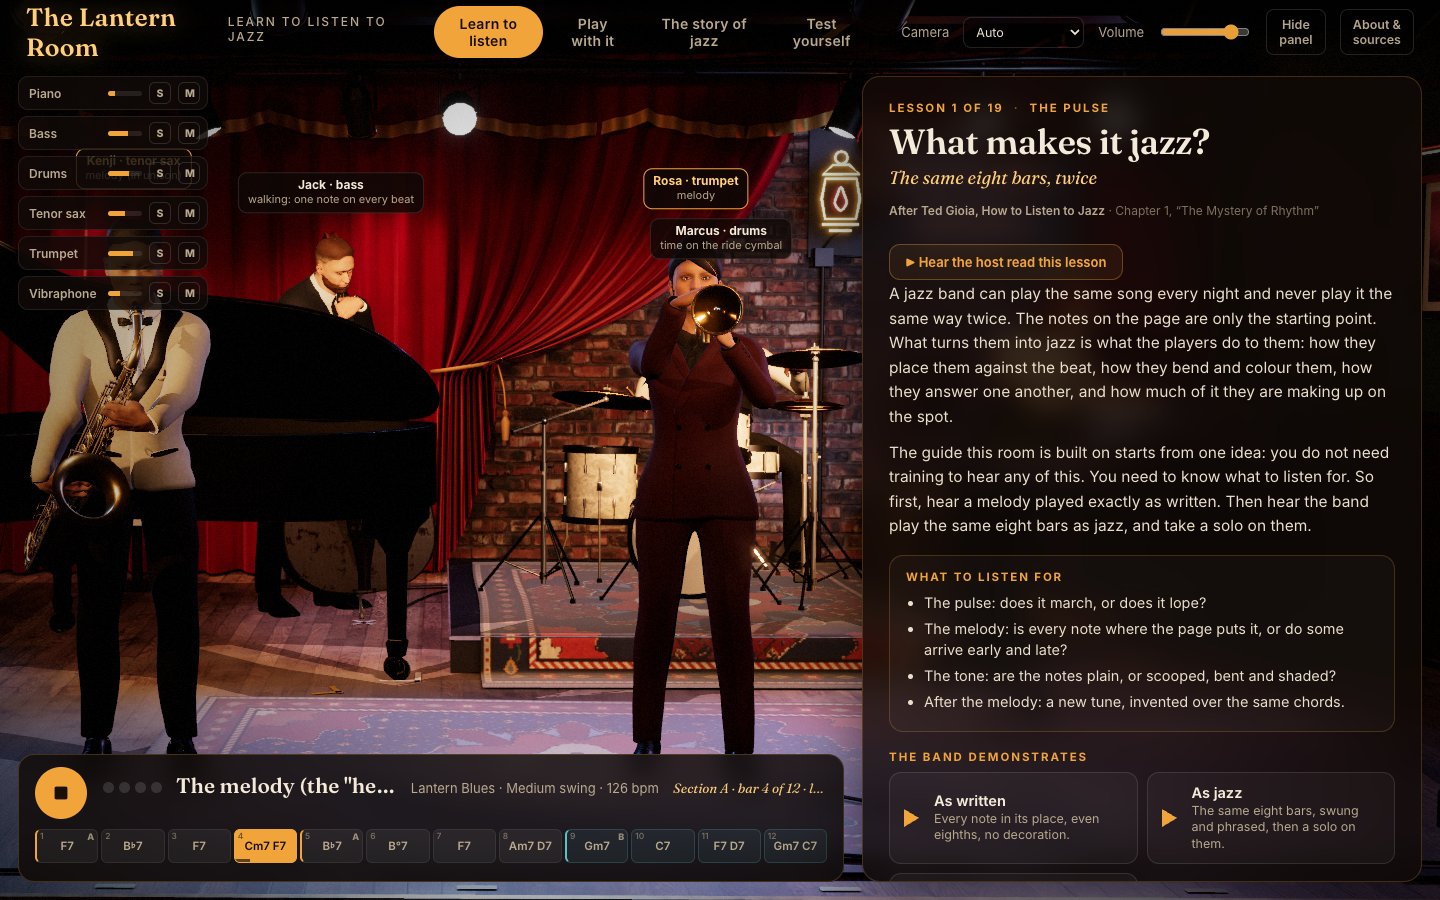
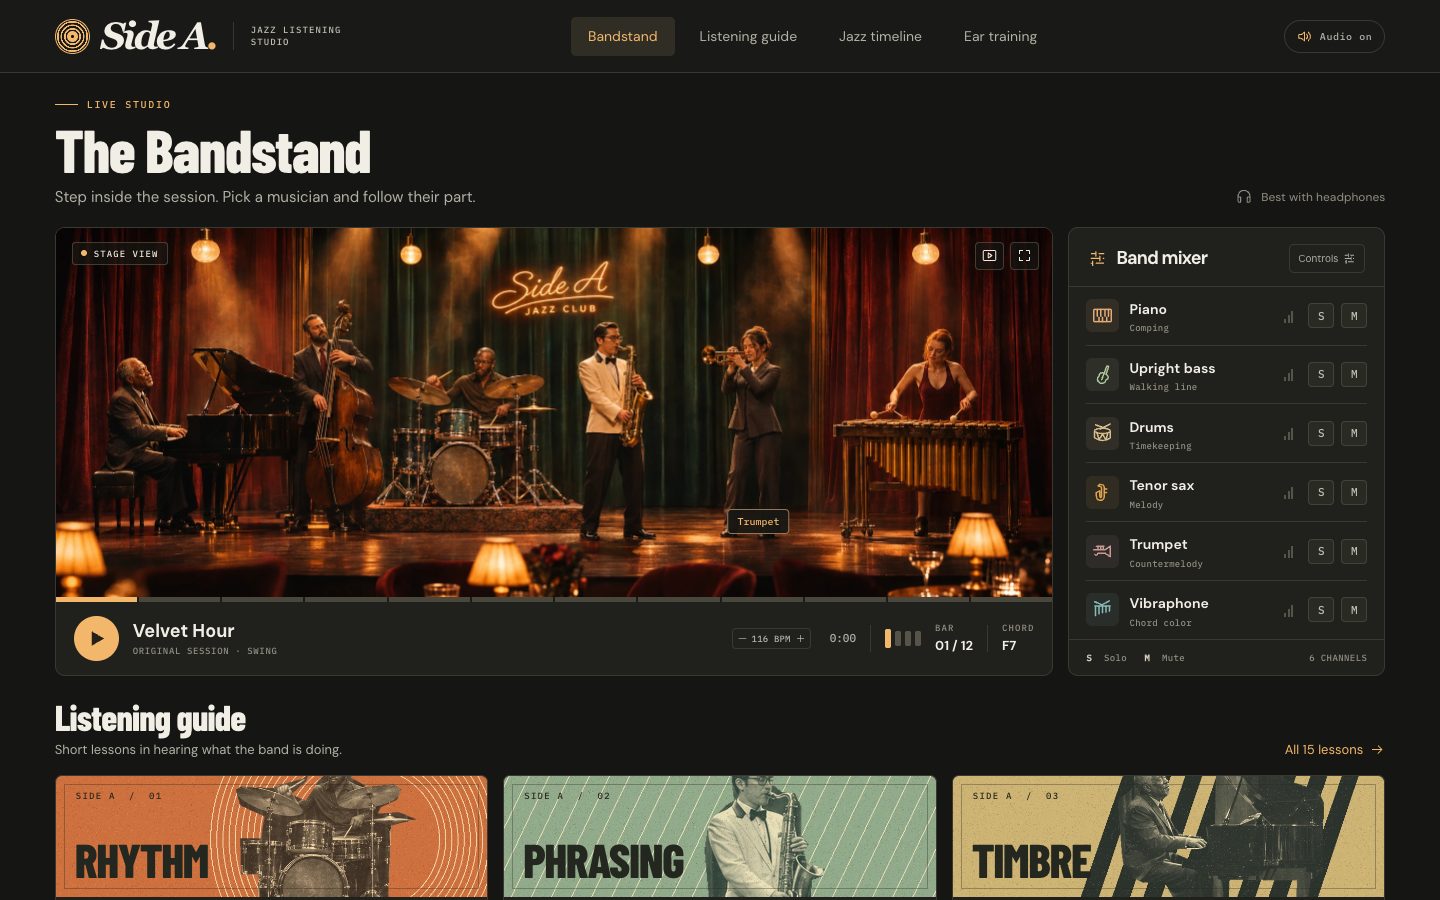
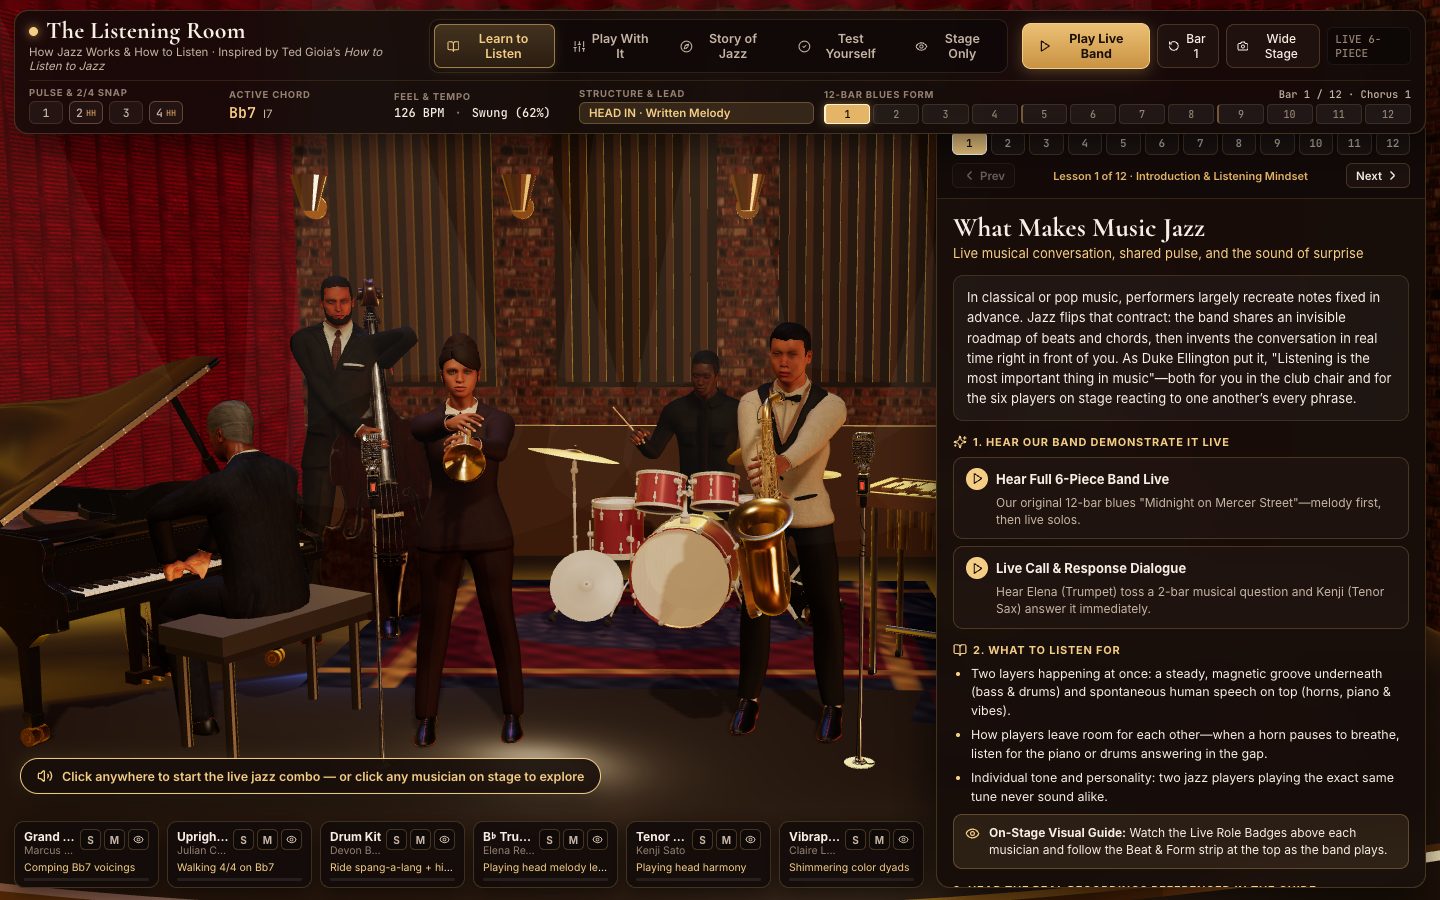
A browser tool that teaches a complete beginner how to listen to jazz, with a 3D band you can see, hear, solo and mute.
The models got a starter kit so the band could look and sound like a real band. It has 3D musicians, nine instrument models, a stage with lighting and textures, and sampled piano, upright bass, drums with brushes and sticks, tenor sax, trumpet and vibraphone. Everything in it is openly licensed, and the per-file credits are in kit/CREDITS.md.
They also got a copy of Ted Gioia's How to Listen to Jazz, which I can't share. The public prompt asks you to buy or borrow the book and build the lessons around its listening framework.
Build an interactive tool in the browser that teaches a complete beginner how jazz works and how to listen to it, with a band of musicians you can see and hear.

Context you should know: your build may be compared side by side with builds other AI models made from this identical prompt. The person using it loves music but knows nothing about jazz, and by the end they should understand what they are hearing.

The comparison is blind. Never put your model name, your company's name, or any mention of which AI made it anywhere in what you build: not in on-screen text, credits, the page title, file names, code comments, or metadata.

**Start with the listening guide.** Build the lessons around the listening framework of Ted Gioia's book *How to Listen to Jazz* (called "the guide" below). No copy of the book comes with this prompt: the person running it should buy or borrow one, and you follow its chapters' ideas. It is the backbone of this tool. The learner wants to be taught how to listen the way this book teaches: what to listen for in the rhythm and swing, the phrasing, the pitch and timbre, the dynamics, the personality and the spontaneity of a performance, how a jazz performance is structured, where jazz came from, how its styles evolved, and who its innovators were. Teach those ideas in your own words, demonstrated by the band, and credit the book on screen. Do not copy passages from it beyond a short quote.

**The history comes from Wikipedia.** Use the Wikipedia API (the MediaWiki or REST API) to pull the facts, dates and summaries for the eras, styles and musicians in your timeline, and use only images from Wikimedia Commons whose licence allows reuse, with the credit and licence shown. Cite each fact's Wikipedia article; list every source in the README.

**Real instruments, your own music.** The band must sound like real instruments played by real musicians: a real acoustic piano, upright bass, drum kit with ride cymbal and brushes, tenor saxophone, trumpet, and guitar or vibraphone. Use openly licensed single-note instrument sample libraries (list each one and its licence in the README) or synthesis good enough to pass for the real thing. Every piece of music must be your own composition and arrangement: no recordings or samples of existing songs, and no melodies you didn't write. It must swing and sound like real jazz, not a MIDI demo.

**Your starting kit.** `./kit/` (the free starter kit that comes with this prompt, unzipped) holds openly licensed raw materials: two sets of rigged 3D people (`people/` and `people-hd/`), 3D instruments, single-note recordings of real instruments with note maps (`samples/`), and club lighting and stage textures (`env/`). Licences are in `kit/CREDITS.md`. Put the credits in your README's credits list only; do not show credits anywhere on screen. **The kit is a floor, not the finish.** Use it, change it, or replace it, but the band on screen must be your own design: in Blender, headless by script, refine every musician's face, skin, hair, clothing and build until they look like real people, and design the stage, the club and the lighting yourself. The kit has no poses and no animation: seating the band and making every musician's hands, fingers and body play the notes you hear is your job. **The bar is photoreal:** a viewer should have to look twice, with fingers on the right keys and strings.

Requirements:

1. **The band on stage.** A beautiful, animated combo of at least piano, bass, drums, a horn and one more instrument, playing live in front of the learner, with each musician's hands and body moving in time with what they play. Click a musician to solo them, mute them, or open their instrument: what it is, how it makes its sound, what its job is in the band, and what it sounds like on its own.
2. **Learn to listen, the way the guide teaches.** A guided path of short lessons that a complete beginner can follow, built on the guide's chapters: rhythm and swing, phrasing, pitch and timbre, dynamics, personality, spontaneity, and the structure of a performance. Each lesson tells the learner what to listen for and then lets them hear it, each demonstrated by the band as you watch, with visuals that show what is happening as it plays: where the beat is, which chord we are on, where we are in the form, who is soloing and what the others are doing behind them. Cover at least: what makes music jazz; swing and the ride-cymbal pattern; the walking bass line; comping; melody, then solos, then melody again; the 12-bar blues and the 32-bar song form; chords, the ii-V-I and blue notes; how improvisation works and how players know where they are; trading fours and how the band ends a tune; scat singing; and the jazz standard.
3. **Play with it.** Let the learner change things and hear the difference instantly: straight against swung, tempo, the chord, which instrument takes the solo, the style the band plays in, and call and response between two players.
4. **The story of jazz.** A beautiful visual timeline of the eras and styles the guide covers, from New Orleans to today, and the innovators who defined each one, built from the Wikipedia API with licensed Commons images, and with your own music written in each era's style so the learner hears how the sound changed. For each era, add what to listen for, in the guide's terms.
5. **Hear the real recordings.** Wherever the guide points the reader to a recording or a moment (a solo, a performance, a musician speaking), find that recording on YouTube and embed it right there in the lesson with YouTube's own player, so the learner can click and hear the real thing after hearing your band demonstrate the idea. Prefer official artist, label or archive uploads, check that every video plays and allows embedding, and say in a line what to listen for in it. Embedded YouTube players are the only place existing recordings may appear; everything your band plays is still your own.
6. **Test yourself.** Listening quizzes: which instrument is soloing, swung or straight, which era is this, where does the form start again, is this the melody or a solo.
7. **Runs at a smooth frame rate** in a desktop browser at 1920x1080, with sound starting on the first click.
8. **Deliver** a runnable project with a documented run command and a README with your sources and sample-library licences.

DONE when: the band sounds like real instruments and swings, every musician can be soloed, muted and explored, the lesson path covers every idea above with the band playing it, the lessons teach listening the way the guide does, the timeline is built from the Wikipedia API, the recordings the guide points to are embedded from YouTube and play, the learner can change the music and hear it change, the history and quizzes work, all music is your own, every fact is sourced, and it runs smoothly, and it works at its live URL on the static host you chose.
Work entirely inside this directory. Install whatever you need (node, tone.js, playwright). Bring your own YouTube Data API key if you want help finding the recordings, and your own ElevenLabs API key if you want voice and sound effects. Use any image generator you have for images and textures. Run Blender headless by script (`blender --background --python <script>.py`, with relative script paths). Produce a static build (dist/ or a top-level index.html; if you use a bundler, set its base to './') with a documented run command. QA your own work in a real browser and look at your screenshots critically. Write BUILD_NOTES.md when done.

**Publish it live.** When it's finished and you've checked it, deploy it to a static host of your choice. The build may be served from a subfolder, so every asset path must be relative (`./assets/x.png` or `assets/x.png`, never `/assets/x.png`; in Vite set `base: './'`). Then open the live URL in a headless browser and confirm everything works there, not just locally. Put the live URL at the top of your README.
Test 3: A photoreal open-world crime game
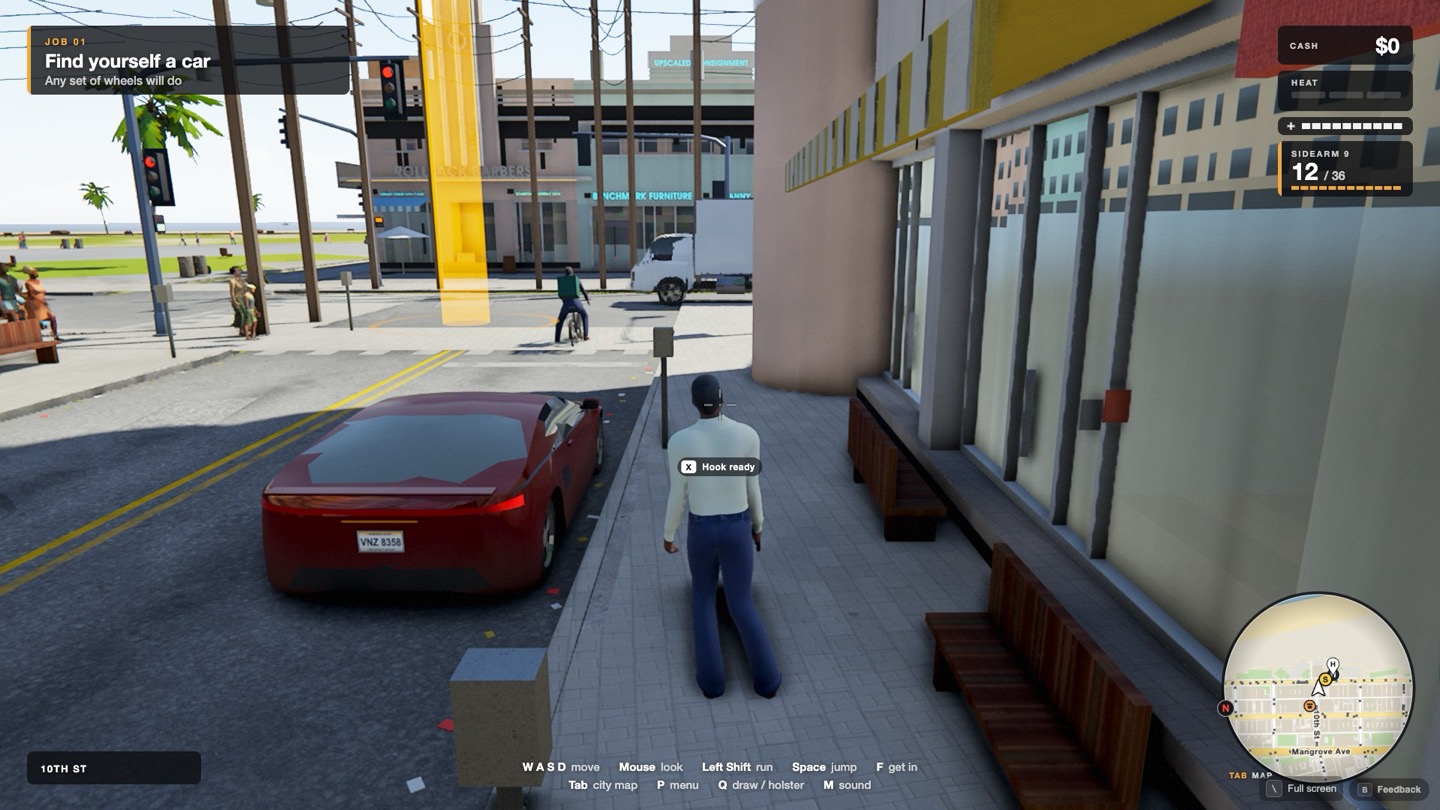
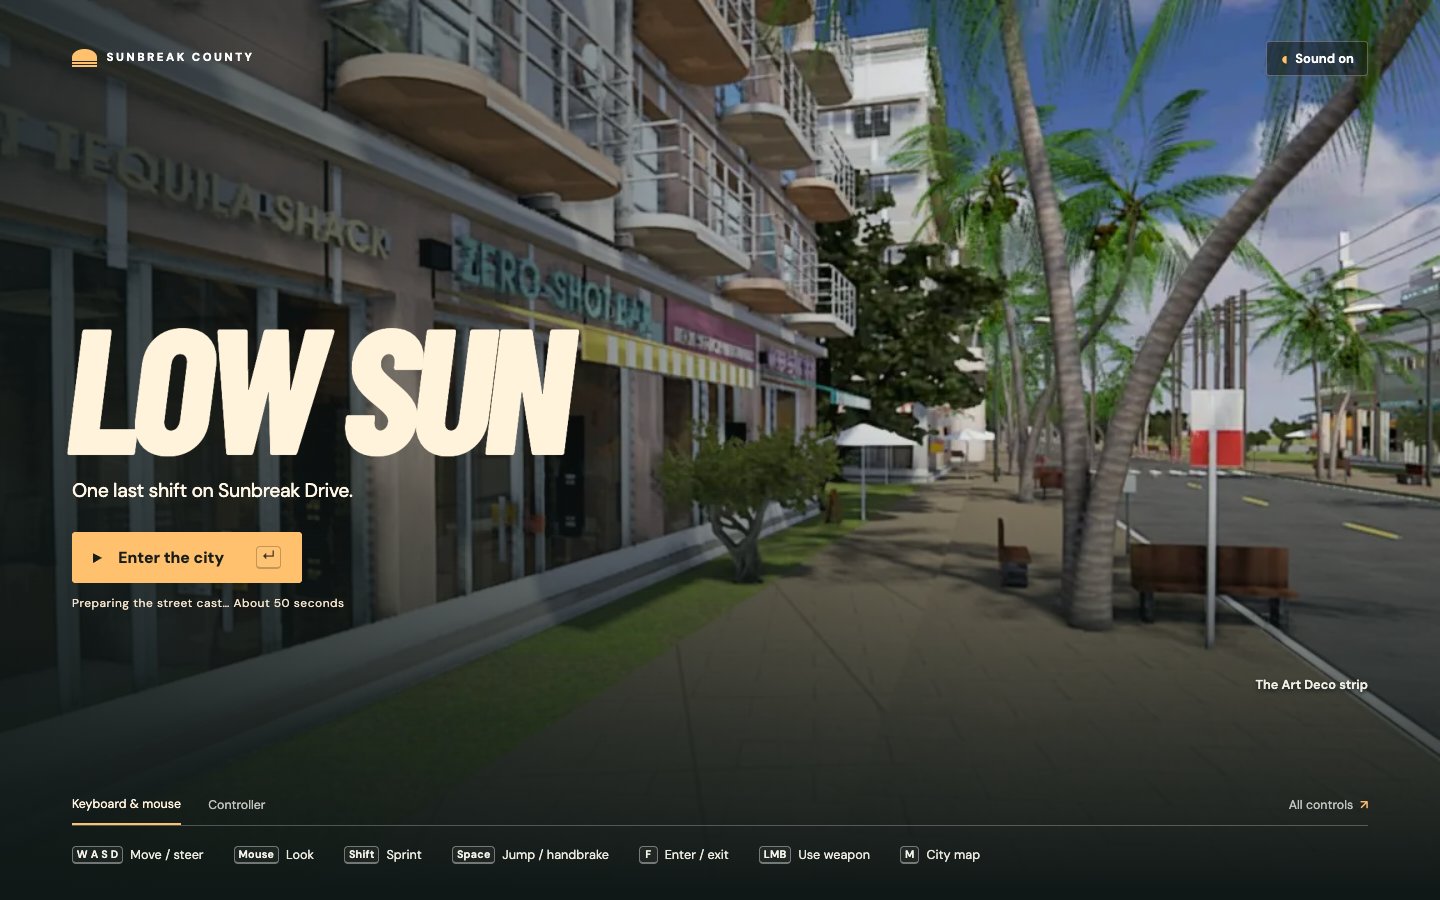
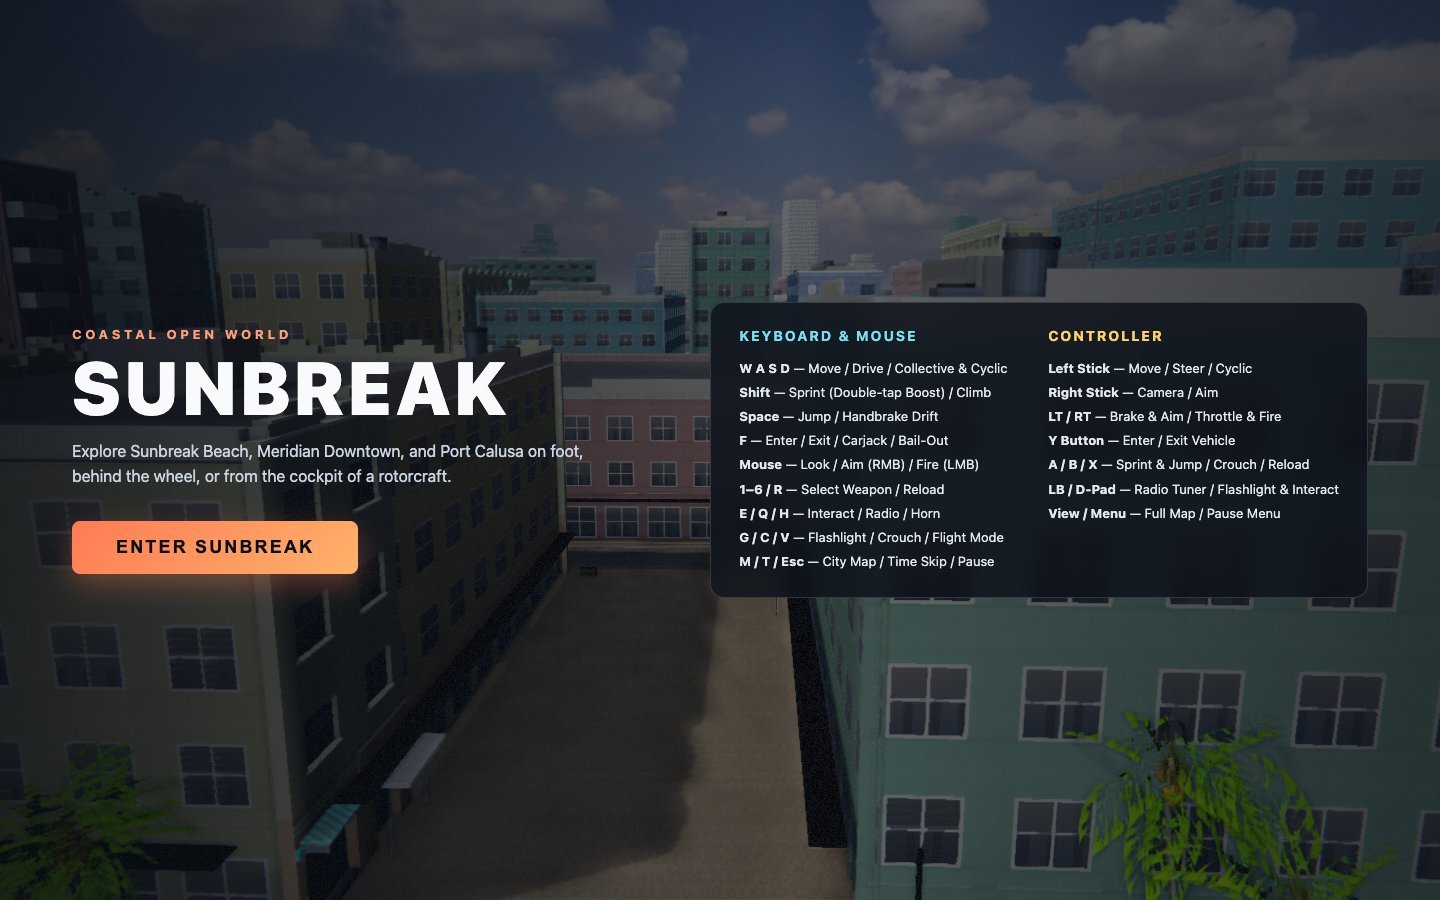
A browser game set in a ready-made coastal city, built from a design spec with 510 acceptance checks.
The models got a full design to build from. SPEC.md and the four docs in spec/ cover the rendering and the world, vehicles and movement, police and combat, and city life and the HUD, with 510 acceptance checks built in three priority tiers.
The city ships in map/: one JSON file with the road graph, traffic signals, buildings, water, points of interest and five missions across three districts, plus a top-down preview and a validator script.
The models also got a city kit of buildings, cars, a police cruiser, a helicopter, weapons, people and palm trees, and an audio pack with street voices and five radio stations.
Build a photorealistic open-world crime game that runs in the browser, set in the city in `./map/`.

Context you should know: your game may be compared side by side with games other AI models built from this identical prompt.

The comparison is blind. Never put your model name, your company's name, or any mention of which AI made it anywhere in what you build: not in on-screen text, credits, the page title, file names, code comments, or metadata.

Make it your own original game: no real game's names, characters, logos, music or branding.

**Read `SPEC.md` and every file in `spec/` in full before you write any code.** Together they describe every system this game must have, the numbers behind each one, and the acceptance check that proves it works. They are the design. Build every item: P0 first, then P1, then P2.

Requirements:

1. **The city is `./map/`.** It holds the road network, building footprints and heights, lots, lamps, landmarks, shops and mission locations of an existing city (`map/MAP.md` explains every field). Keep its layout exactly: every road where it is, every building where it is. Geometry detail, facades, street dressing, trees, water and sky are yours to build on top of it.
   **`./kit/` is that city's own material** (the free city kit that comes with this prompt, unzipped). `kit/buildings/` has its building kit pieces, signs, street props and materials, with `placements.json` putting every piece where it stands in the city. `kit/vehicles/`, `kit/weapons/` and `kit/props/` have its cars, police cruiser, helicopter, guns and palms. `kit/audio/` has its voice lines (pedestrian and police barks, radio) and music, indexed with their text in `index.json`. `kit/data/` has its missions and tuning. Use all of it: these are this city's buildings, cars, guns, voices and missions. Raise their quality as far as you can; replace a piece only when you can make a better one of the same thing. Licences are in `kit/CREDITS.md`.
2. **Photoreal.** A viewer should have to look twice. Get there the way `spec/rendering-world.md` describes: build the city in Blender, bake its lighting offline, texture it from real photographs, and finish the frame with the camera look in the spec.
3. **People from real bodies.** Build every person in the game, player, pedestrians, drivers, police and medics, from open human bodies: MakeHuman / MPFB2 bodies, clothes and hair (CC0) and HSRD-100 3D human scans (CC BY 4.0), cleaned, rigged and dressed in Blender, animated with the CMU motion-capture library (mocap.cs.cmu.edu). `./kit/people-hd/` has six MPFB bodies with full finger rigs to start from. No stock game characters.
4. **Cars, guns and props** come from openly licensed sources (CC0, CC BY, MIT) or your own Blender and code work. Credit every third-party asset in `CREDITS.md`, the README, and a `credits.html` page published with the build (the CC BY licences require it); never show credits in the game's own screens.
5. **Runs smoothly** in desktop Chrome at 1920x1080 on a laptop graphics card, keyboard and mouse plus gamepad, with the controls on a start screen.
6. **Deliver** a README.

DONE when: every acceptance check in `SPEC.md` and `spec/` passes, verified in a real browser with real input and screenshots you have looked at critically, the city matches `./map/` road for road, every person is built from the open bodies above, it runs smoothly, and it works at its live URL on the static host you chose.

Work entirely inside this directory. Install whatever you need (node, three, playwright). Bring your own ElevenLabs API key if you want new voice lines and sound effects. Use any image generator you have for images and textures. Run Blender headless by script (`blender --background --python <script>.py`, with relative script paths). Produce a static build (dist/ or a top-level index.html; if you use a bundler, set its base to './'). QA your own work in a real browser and look at your screenshots critically. Write BUILD_NOTES.md when done.

**Publish it live.** When it's finished and you've checked it, deploy it to a static host of your choice. The build may be served from a subfolder, so every asset path must be relative (`./assets/x.png` or `assets/x.png`, never `/assets/x.png`; in Vite set `base: './'`). No single file may be over 95 MB: split or stream big assets. Then open the live URL in a headless browser and confirm everything works there, not just locally. Put the live URL at the top of your README.
What it cost
Every build's tokens, cost and build time are in its test's table, and the totals are below.
Per million tokens, Fable 5.2 costs $8 for input and $40 for output, GPT-6.2 Astra costs $8 and $40, and Gemini 4 Carbon costs $2 and $10. Most of each build's input is the agent re-reading its own context, which is billed at a cached rate: $0.20 per million for Fable 5.2, $0.40 for GPT-6.2 Astra and $0.10 for Gemini 4 Carbon.
Gemini 4 Carbon is priced at Google's launch rate. At the $4 and $20 rate Google lists for after the launch period, its builds would have cost twice as much: $68.51 for the video editor, $20.02 for the jazz tool and $42.22 for the crime game.
These are API-equivalent costs, meaning the real token counts from each build priced at each model’s published rates, even though the builds themselves ran on subscriptions.
Try them yourself
Every build is live above, so you can open each one and judge it for yourself. Each test's table has what that build cost, how long it took and how many tokens it used.


Comments
Sign in to join the conversation.